6.0 Status bar features for projector sewing

Specific parts of the workspace that are used for projector sewing include the bottom right corner of the screen, which has these items on the status bar:

Page: here you can change pages if the file has multiple pages

X and Y: coordinates of where the mouse is on the canvas/page. Beginners don’t need to use this. 

Z: Zoom level – this box will accept and change the zoom level in 0.1% level of accuracy increments, but the screen will always round to the nearest whole number. This is a feature request that has been sent to Inkscape, that future updates allow not just changing zoom in small increments, but also seeing that decimal zoom on screen. In addition, there is a bug when entering a decimal number that it only seems to register the change after typing a whole number. For these reasons, Section 7.0 has better steps for calibrating in Inkscape than the regular method of typing numbers in the zoom box.

R: Rotates the entire PDF page. Enter the angle you want to rotate by. “Right way up” is 0, so to rotate from portrait to landscape orientation, enter 90. Press return and the page will be rotated. Negative numbers can be entered to rotate in a counterclockwise direction. (In section 11.2 of this guide, the steps to rotate individual pieces instead of the entire page will be explained.)

4.0 Finding your way around the workspace

“What are all of these things around my pattern?” is the first question that comes up when using Inkscape. For projector sewing, we can hide most of the toolbars as we only use a few key parts of the workspace features. 

One of the advantages of Inkscape over Adobe for projecting is that we can do most of our pattern preparation work in Full Screen mode so that the workspace is as simple as possible with just the tools we need. Click here for steps to access and customize Full Screen mode to do that, and then you don’t even need to know anything about any of the toolbars as they will be hidden. 

Here’s how Full Screen mode can look for basic pattern projecting work, with layers panel on the left, zoom setting on the lower right and menu functions at the top.

If you want to understand more about the Inkscape workspace tools, the picture and description below give an overview of each of the parts of the workspace. There’s no need to remember each of these names and functions, just refer back to this information when needed.

From The User Interface — Inkscape Beginners’ Guide 1.0 documentation (inkscape-manuals.readthedocs.io):

5.0 Infinite scrolling and micro-scrolling

One of the major advantages to using Inkscape over Adobe Reader for projecting patterns, is that Inkscape has infinite scrolling in all directions, so we never run out of scrolling room.

(“Running out of scrolling room” creates problems for projecting because it limits where we can move the PDF around the screen and get pieces to be projected where we need them on our screen. With Inkscape’s infinite scrolling, we don’t have that problem and no longer have to add large margins to our patterns as a workaround.)

To use the keyboard to move the pattern when projecting or the calibration tool when calibrating press the Control key (Command key on a Mac) and the arrow key. 

Pressing only the arrow key will not work, Control/Command at the same time as the arrow key will do the micro-scrolling we need.

3.0 Saving file in SVG format

Inkscape cannot yet save in PDF format with layers, so to save any changes you make to a PDF pattern file, you will need to save the file in SVG format. (SVG stands for Scalable Vector Graphics, and is used across many software). SVG format will be the default format when you choose File > Save.

For our purposes, saving in SVG format doesn’t change anything, so it is the best format to save files in Inkscape.

If you need to open the layered pattern in another software that doesn’t open SVG files, such as Adobe Reader, you can use a different software, such as one called Scribus, which can save a layered SVG file to a layered PDF file. If you need to open the file in another drawing program, like Affinity Designer or Adobe Illustrator, open the Inkscape SVG file in those software and all layers will be preserved, and no need to use the PDF format to transfer files between the software.

2.0 Importing/Opening PDF patterns

To add a PDF to the current document, select  File > Import

To open a PDF as a new document in Inkscape, select File > Open.

When you open or import a PDF, this dialog box with multiple options shows up. For beginners, you don’t need to learn what all these options mean, as you may never need to use any.

The main option to change on this screen is to change the Fonts setting to Substitute missing fonts for best results and performance.

If you experience crashing with some patterns, then the 5th option Draw all text is the best one as it removes fonts entirely, which are the most common reason for crashes.

Then press OK.

**If the file size of the PDF is very large  (over about 30MB listed in your file browser / or look at file size during download), the layered pdf may be very slow to load and use. In that case the “Cairo import” option on PDF Import screen will allow the file to open and be unusable, but layers won’t be imported.

If that happens, please post about this and tell us the name of the pattern having this issue in Projectors for Sewing. That way a list of patterns that Inkscape needs to better import will be sent to developers for future improvements to the import feature in Inkscape.

1.0 Install and Open Inkscape

Section 1.1 Install:

Inkscape 1.3 works with computers running:

  • Windows 8.1 or later, including computers running in Windows S mode
  • MacOS High Sierra (10.13) – Ventura (Mac OS 13)
  • GNU/Linux

There is no Inkscape version for iPad/iPhone/Android/Chromebook. On iPad, the Affinity Designer app is a paid software (one-time payment, not subscription-based) that is a vector editor/drawing app with very similar functions as Inkscape. The Affinity Designer for Pattern Design and Alterations Facebook group is a very helpful resource for learning Affinity Designer, if interested.

To download Inkscape version 1.3 go to: www.inkscape.org and click Download Now!

On Edge and possibly other browsers you may get a security warning when downloading it, Press the three dots menu next to the file name in the downloads list  to get to additional options and click Keep. A second security message may come up, and click the arrow button to show all options, and click Keep Anyway. You could also Report this app as safe. Many others will do that, and then this message will stop appearing for everyone.

If you need specific installation steps, here are links to help:

Section 1.2 Open:

After you install Inkscape, when you open the program, you will see a screen that guides you through some default settings for your Inkscape workspace. You don’t need to change anything on these screens. But if you would like to change the program to dark mode, or change the tool icon style, and other options, you can do that in the Quick Setup screen. There are two mode screens after the Quick Setup screen. You can quickly skip them by just pressing Enter each time, and then it will bring you to a new, blank, document. On the last Time to Draw screen, you can clear the Show this every time box if you don’t want these startup screens.

Introduction

What is Inkscape and why should I learn to use it? Inkscape is a free and open-source, drawing and vector-editor program, for computers (Windows, Mac or Linux). It is *not* necessary to learn Inkscape to be a projector sewist, but for for those who want to use tools to alter pattern to make fitting or style adjustments digitally, Inskcape is a good choice for that.

Set aside about 20-40 minutes to learn the basic tools for opening, viewing, and projecting sewing patterns with Inkscape, using the steps in this guide (Part A, Sections 1.0 to 10.0). Once the basics are learned advanced functions can be explored as needed (Part B, Sections 11.0 to 15.0). After learning the basics of Inkscape, the software is no longer overwhelming and becomes very user friendly. Learning a vector-editing program like Inkscape is a useful and marketable skill that makes lots of other graphic oriented tasks simpler (such as embroidery designs, logo making, poster and invitation designing, etc.).

Inkscape is an ideal tool to make digital pattern adjustments relatively easy, and fun to do. Currently this guide has some links to pattern adjusting using Inkscape, and in the future this guide will be updated to add more information about tools to use for pattern adjusting and how to use them.

This guide is based on the extensive, and very helpful Welcome to the Inkscape Beginners’ Guide! — Inkscape Beginner’s Guide 1.0 documentation (inkscape-manuals.readthedocs.io), with additional info specific for projector sewing, and to version 1.3. This guide is released as a Creative Commons work licensed as Creative Commons — Attribution-ShareAlike 4.0 International — CC BY-SA 4.0.

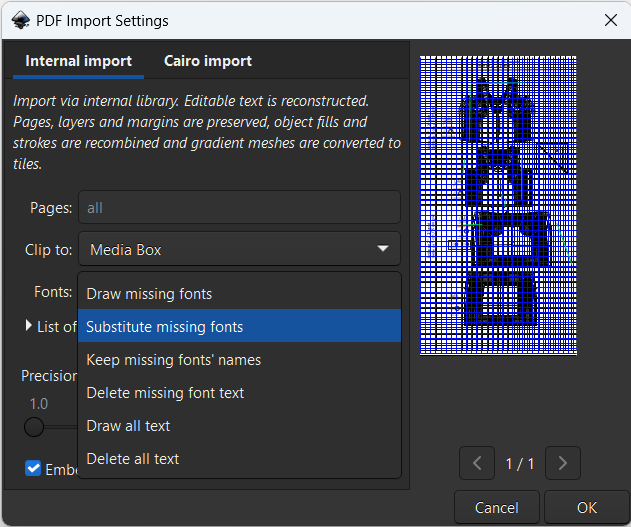
Version 1.3 is the first version to import PDF layers, so it is now the best choice of software for projector sewists, because it has all the functions we need for projector sewing:

Basic projector sewing functions (covered in this guide)

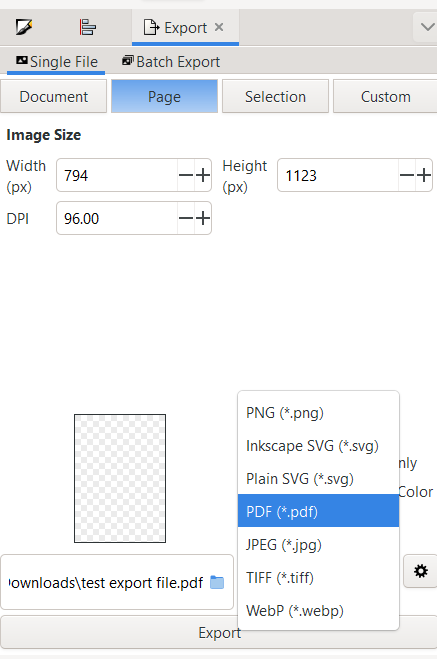
  • Importing PDF and preserving layers
  • Setting zoom for accurate scaling
  • Full-screen viewing capabilities
  • Scrolling/rotating/mirroring/moving pattern and pieces where we want them
  • Changing line appearance for better visibility

Advanced projector sewing functions (not included in this guide yet)

  • Grouping and moving pattern pieces into a digital “fabric marker” to plan cutting layouts
  • Cutting pattern pieces to adjust them for height
  • Slashing pattern pieces and rotating part of a piece to add fullness, rotate/change darts, etc.
  • Hacking patterns to add features from other patterns to alter style or fit. 
  • Importing letter/A4 or other print format sizes of patterns to digitally assemble them into complete pattern pieces for projecting

And the huge bonus, of course, is that it is free! Donations to fund ongoing development will help Inkscape continue to improve and add features: Donate | Inkscape

If you want to give thanks to two people who have helped Inkscape with the layers import function critical to the needs of projector sewists and support their future projects and get updates, consider supporting:

Marta Gvozdinskaya | creating digital adjustments tutorials for projector sewing | Patreon
Martin Owens | creating Inkscape Fixes and Features | Patreon

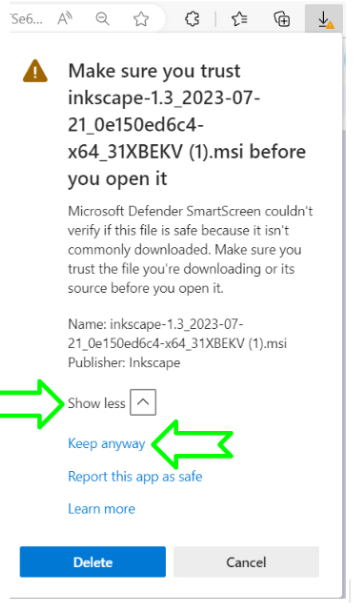
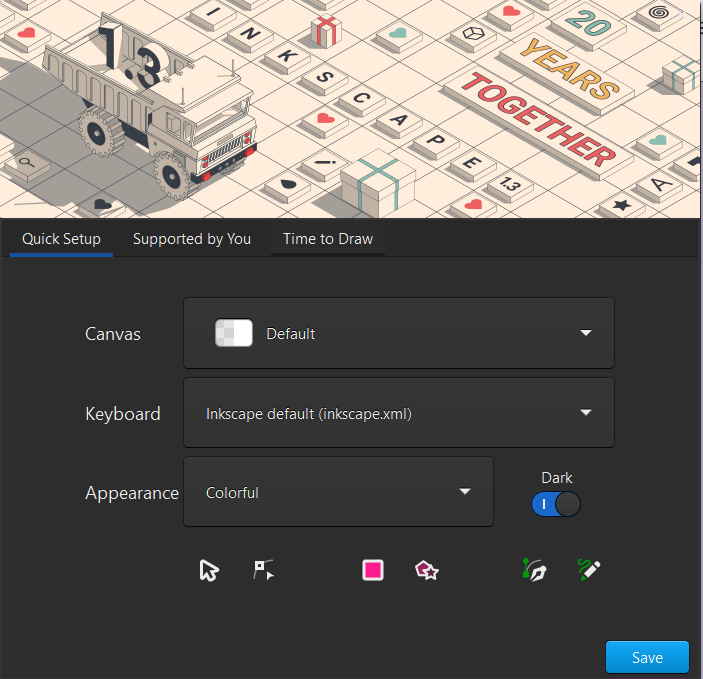
Accessibility note: This first version has some text in images. To see that text in HTML so it can be accessed by a screen reader, click the link above the image to bring you to the section in the the Inkscape Beginners’ Guide! (inkscape-manuals.readthedocs.io), which those images were taken from. There, you will see the text in HTML. Future versions of this guide will eliminate text in images as much as possible.