From The Selector Tool — Inkscape Beginners’ Guide 1.0 documentation (inkscape-manuals.readthedocs.io):
Toolbox icon to bring up Pages tool is a bottom of Tool box (yellow arrow in this image). Then Tool Control Bar with additional page tools will show up at top (in yellow circled area). Page navigation tools in status bar are in lower right area (also circled in yellow).

This image shows the function of the page toolbox control bar icons:
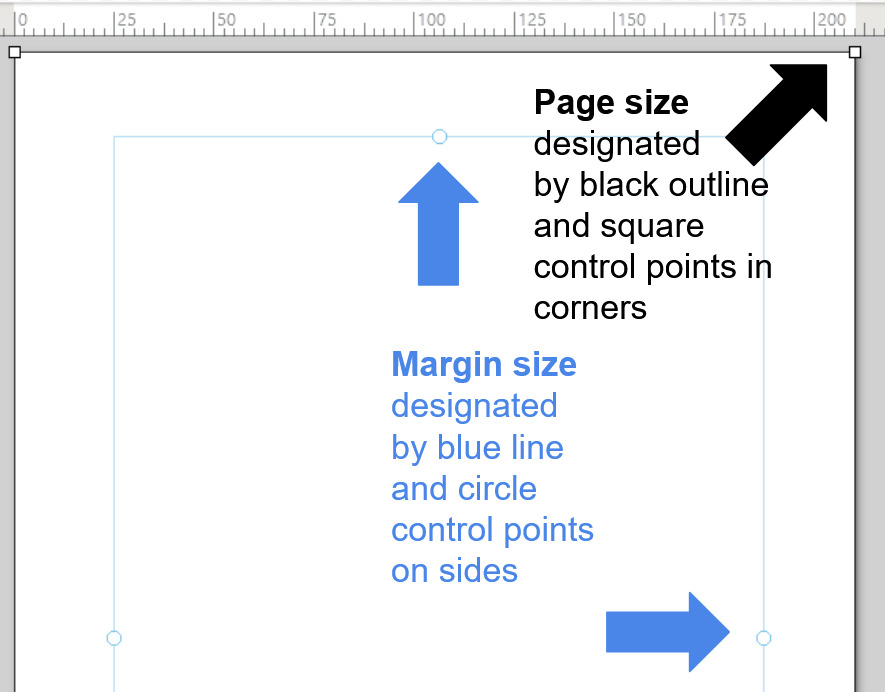
Pages have two borders you may notice:
First and easiest method is to use the menus View > Display Mode > Enhance Thin Lines. This makes a noticeable difference, and may be all you need for patterns that don’t have projector files with thicker lines.

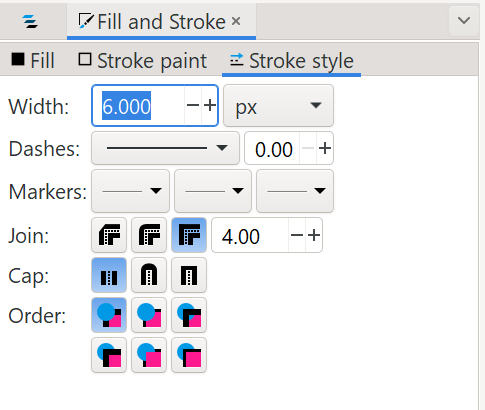
Second method is to use the Stroke options and panel. When specific size layer is selected, each can be made with a different colour or thickness depending on your preference. The steps to change layer line style are in section 8.0 How to access size layers, and change layer colour/thickness (scroll down to last part).
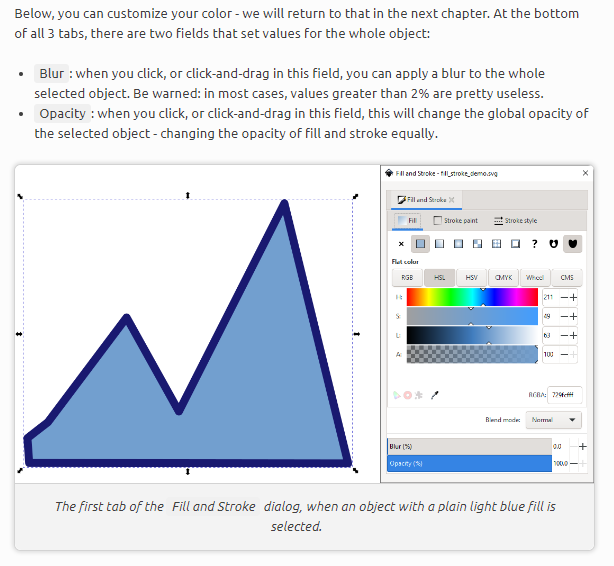
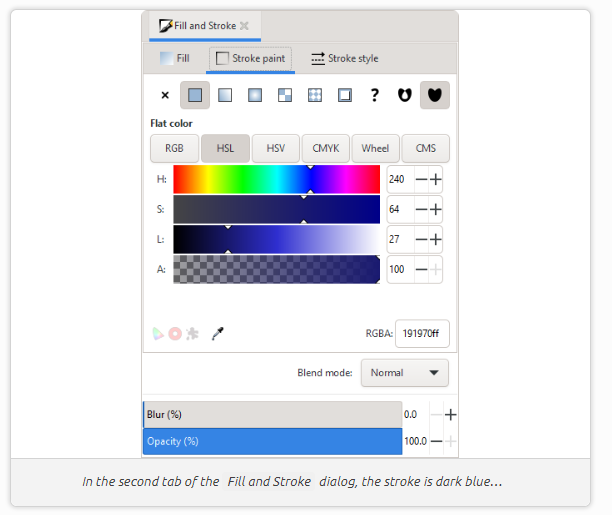
As well, here are more details on Fill and Stroke options, from Inkscape Beginners’ Guide 1.0 documentation (inkscape-manuals.readthedocs.io):


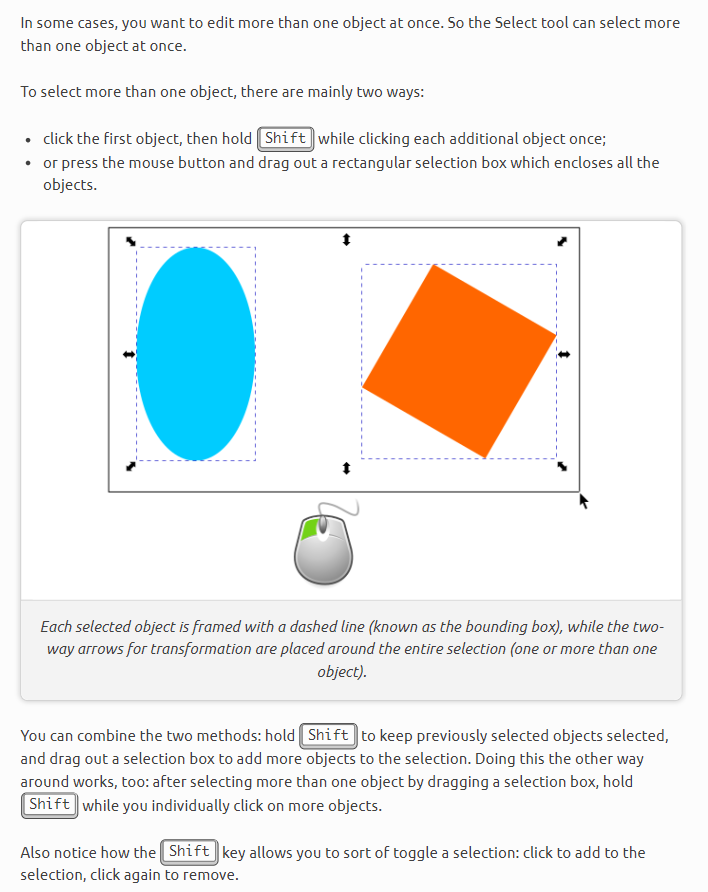
To proceed with the steps in the next sections you have to be able to select entire pieces, in your pattern file, using the Select tool (mouse arrow icon).
On some patterns, you can uncheck layers you don’t need and then entire pieces can be selected without further steps.
For many patterns a few more steps are needed before selecting your entire pattern piece will work. Try each of these actions, until selecting works to choose individual pattern pieces so you can move them:
From The Selector Tool — Inkscape Beginners’ Guide 1.0 documentation (inkscape-manuals.readthedocs.io):
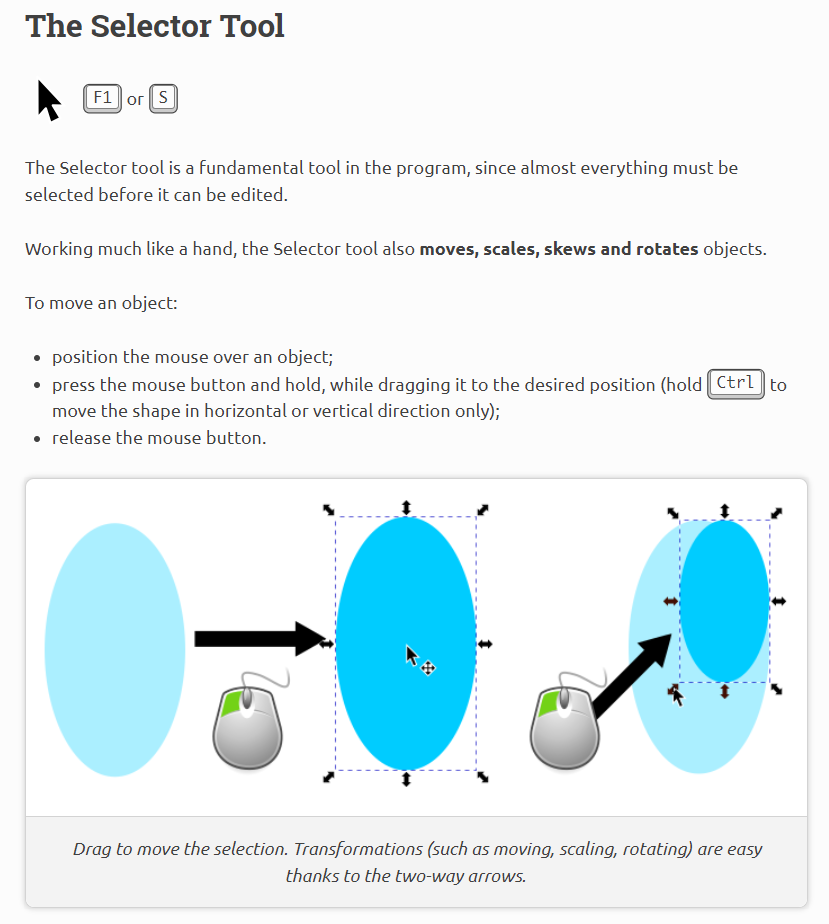
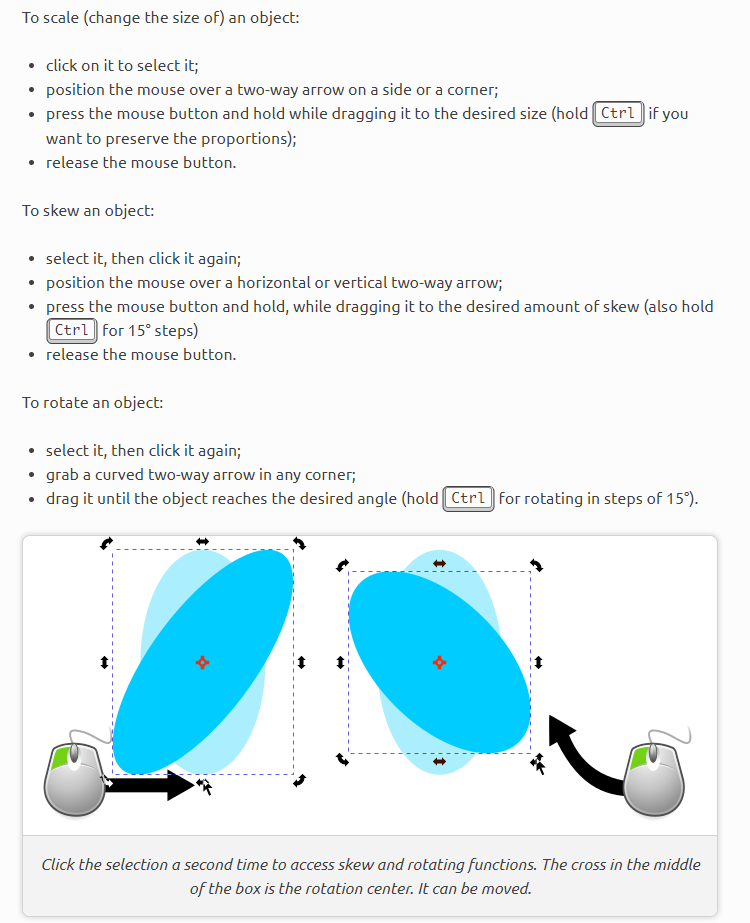
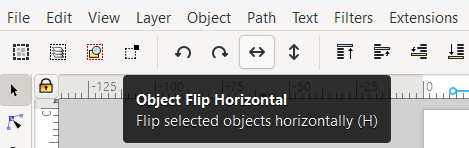
When an object is selected the top Tool Control Bar will show these icons – the circle arrow icons are for rotating, and the side-to-side and up-down arrow icons are for flipping/mirroring objects.
For readers who are already have experience cutting using Adobe with their computer and projector, you can now proceed to Part B.
If you are new to cutting with a projected pattern, this is a good time, to start cutting a first small pattern, and putting in practice the information just learned in the previous sections.
Steps to cut your pattern:
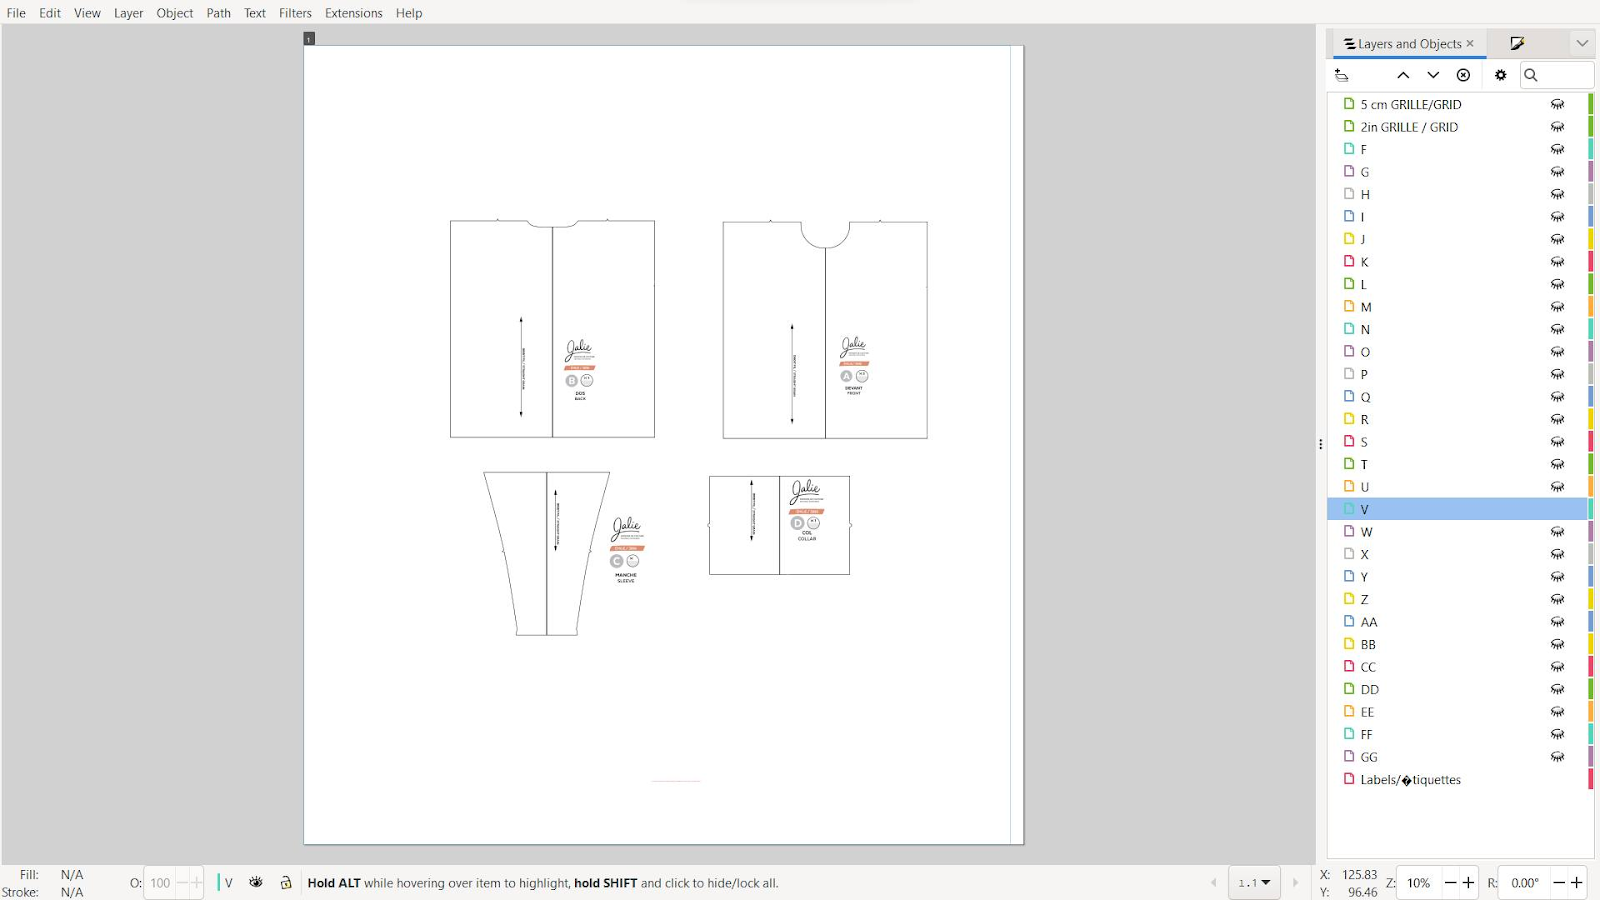
Now your pattern should look something like this on your screen, and on your projection:
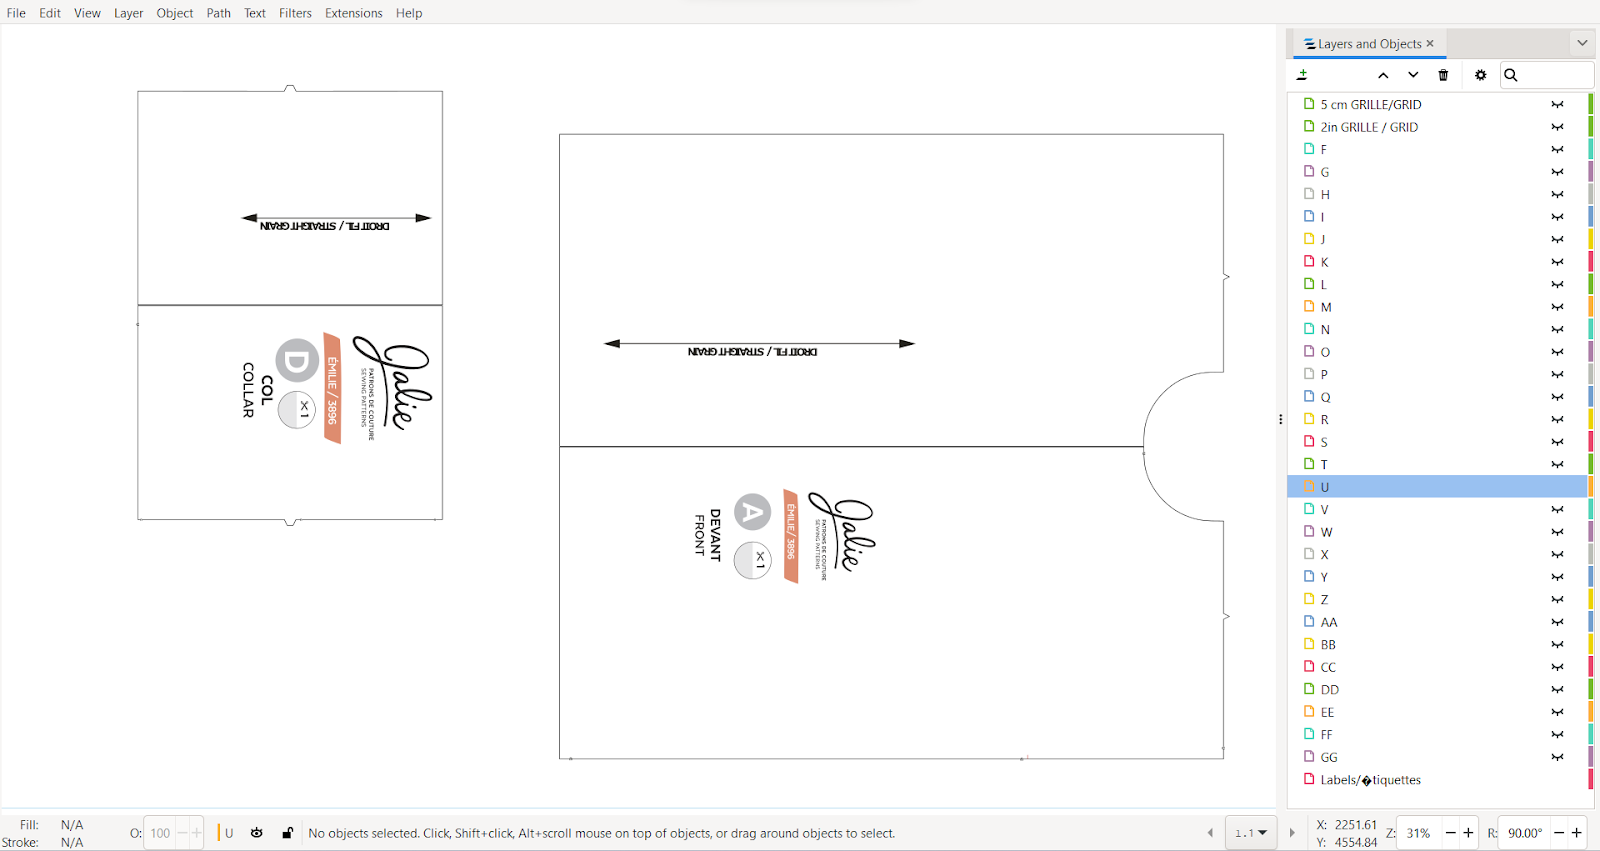
(if you want to follow along with this pattern, this is the free Emilie pattern from Jalie.com).
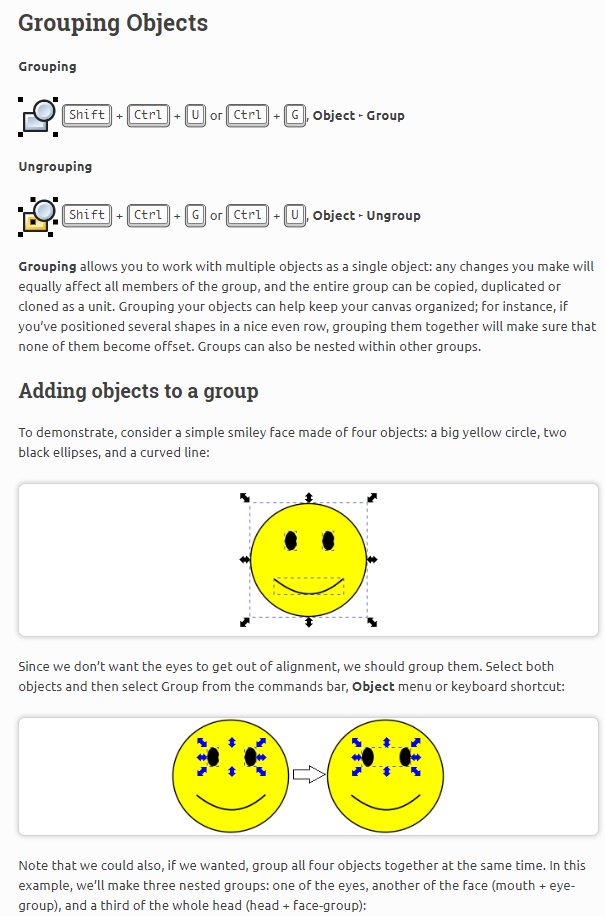
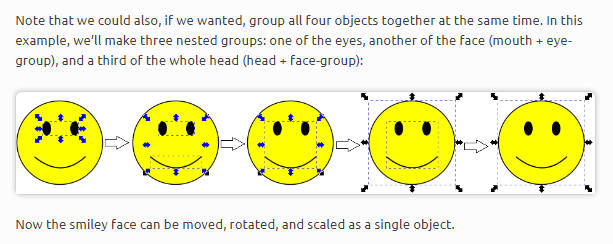
3) Keep cutting with these steps and do the same for all your patterns. Once you feel comfortable with these steps you can move on to the next sections. In particular section 11.0 How to improve visibility of lines and section 12.0 Grouping and Ungrouping Objects will be helpful to get lines to be thicker if needed, and moving objects if you need to (but just scrolling projection in steps above is simpler and quicker in most cases, so it’s fine to stick with that method).
For readers who are already have experience cutting using Adobe with their computer and projector, you can now proceed to Part B.
If you are new to cutting with a projected pattern, this is a good time, to start cutting a first small pattern, and putting in practice the information just learned in the previous sections.
Steps to cut your pattern:
Now your pattern should look something like this on your screen, and on your projection:
(if you want to follow along with this pattern, this is the free Emilie pattern from Jalie.com).
3) Keep cutting with these steps and do the same for all your patterns. Once you feel comfortable with these steps you can move on to the next sections. In particular section 11.0 How to improve visibility of lines and section 12.0 Grouping and Ungrouping Objects will be helpful to get lines to be thicker if needed, and moving objects if you need to (but just scrolling projection in steps above is simpler and quicker in most cases, so it’s fine to stick with that method).
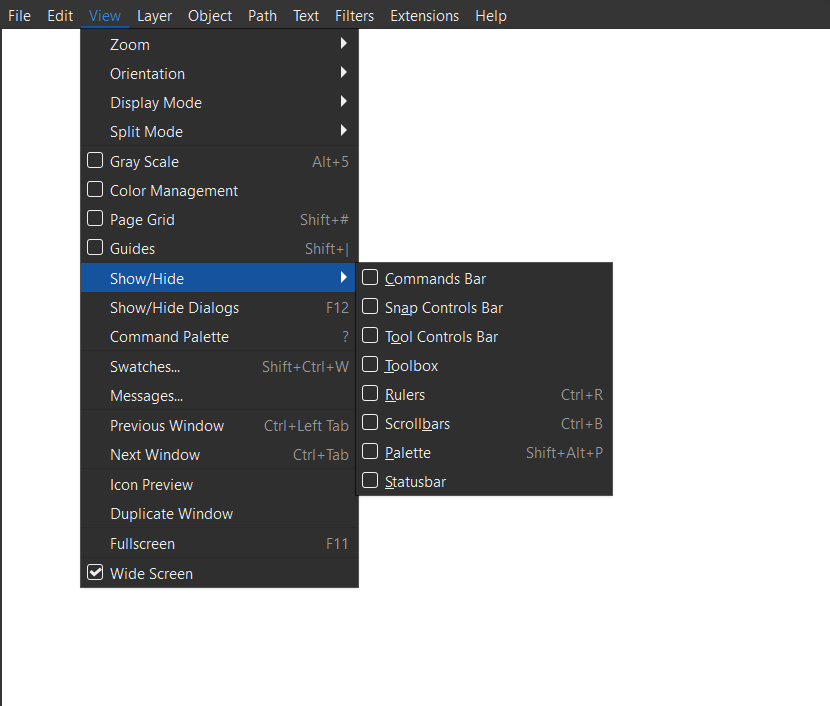
In menus View > Fullscreen (all the way at the bottom of the menu list), will remove some of the workspace toolbars and panels, to make more room to view the pattern. To remove additional tools tools to make more room for patterns, remove each of these items in the View > Show/Hide menu that you don’t want to see:
This adjustment to what you want to see or not see in full screen mode will save automatically for the next time, so this step only needs to be done once.
Once you have chosen in the menus the options to remove items in full screen mode, then go back to regular mode, with F11 or in menus View > Fullscreen. Next time you use fullscreen mode, it will be set to remove all the items you removed in full screen mode last time.
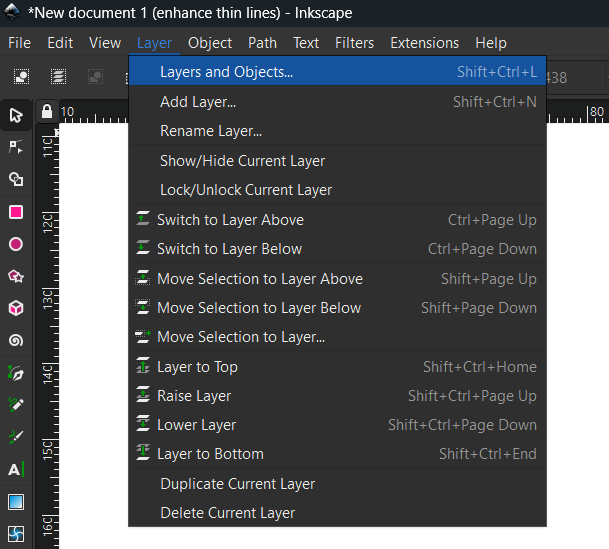
You can view layers when in full screen mode, choose in menus Layer > View Layers and Objects. Then Layers tab will appear in docking area on right side of screen.
To close the Layers tab, press the x button at top of Layers and Objects tab.
The docking area may have multiple tabs open that you wish to hide. Click down arrow icon in upper right corner to bring up menu and select Close Panel to close them all at once.
Any docked panels will have to be closed each time you access full screen mode if they are open.
The Menu bar at top cannot be hidden in full screen mode.
In the menus Layer > Layer and Objects will open the Layers panel in the docking area on the right side of the window.
In the Layers panel, when layers are on/visible, there won’t be any icon on the line for that layer, until you hover over it. When you are hovering, you will see the “open eye” icon, which can be clicked to turn it off/make it invisible. When layers are not visible, they will have the closed eye icon on their line in the layers panel.
With shift or control pressed when selecting, multiple layers can be selected at once. With a selection of multiple layers, pressing the eye icon will change visibility of all those layers at once.
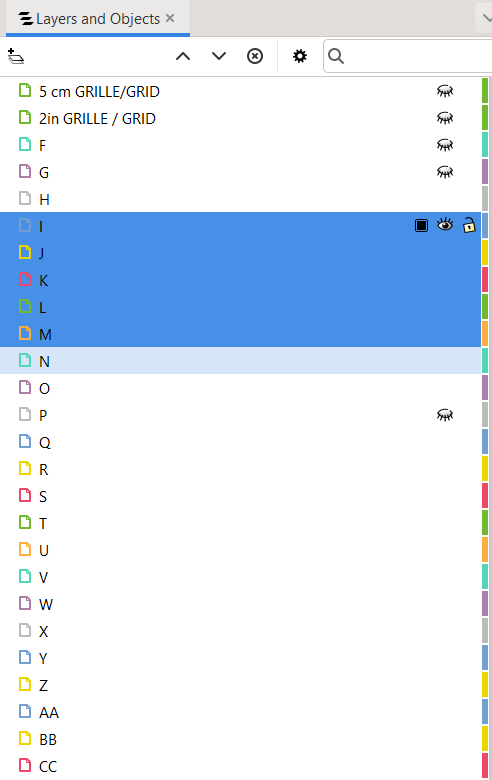
When hovering over a layer, the Lock icon will also show next to eye icon. Click Lock icon to make that layer unselectable if needed. That can be useful if you are making changes to one layer, and want to see, but not select a different layer.
There is a bug currently in Inkscape which is preventing the proper importing of layers from two companies: Sinclair Patterns, and Chalk and Notch Patterns. Until this bug is fixed, the steps in this blog post can be used to quickly recreate the layers. (Inkscape has been alerted to this bug and next version should include fix for this.)
To change line colour and thickness for a layer:
WIth the new auto-calibrating softwares available, such as Pattern Projector (which like Inkscape is free), for most people it will be easiest to export from Inkscape any modified file as a PDF and then continue to project from Pattern Projector because the calibration is so easy and almost automatic in that software.
But if you have previous used the manual calibration method with Adobe, then you could change to projecting from Inkscape, and the only change would be to find your calibration zoom in Inkscape. So the following steps assume you have manually calibrated in Adobe, and everything is accurate there. This is not a full calibration that you will be re-doing in Inkscape, it is just adjusting the zoom level for your calibration tool to be accurate in Inkscape.
To calibrate in Inkscape if you have already manually calibrated in Adobe:
Step 1) Begin by using menus to navigate to Edit > Preferences > Interface.
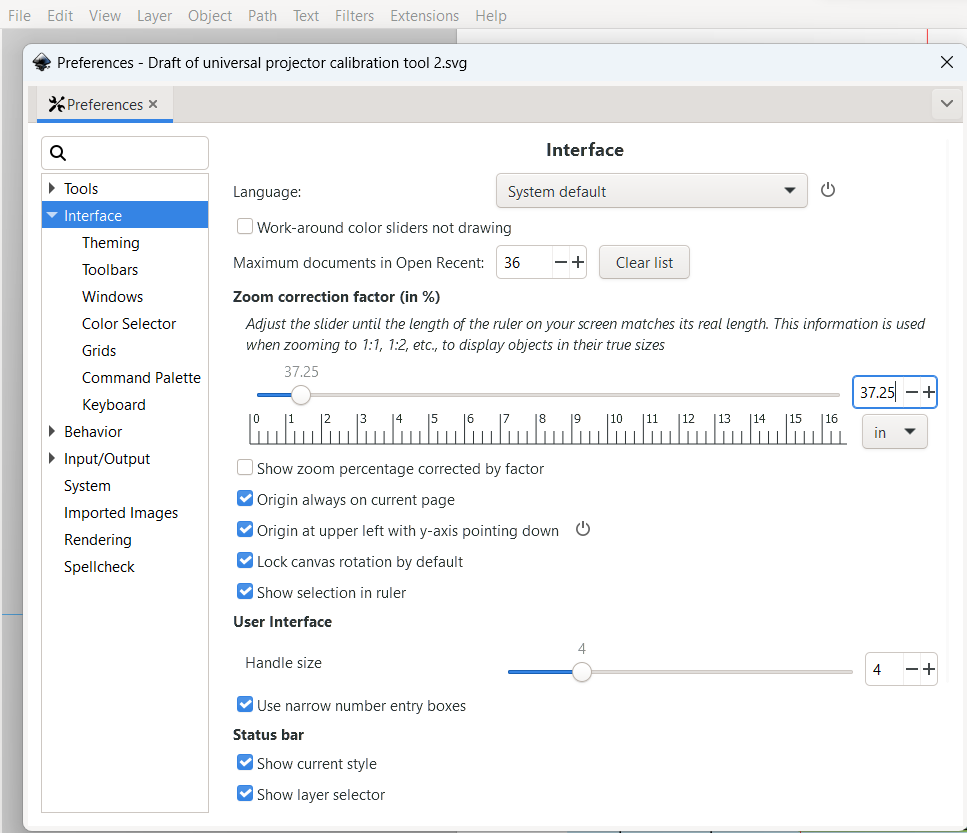
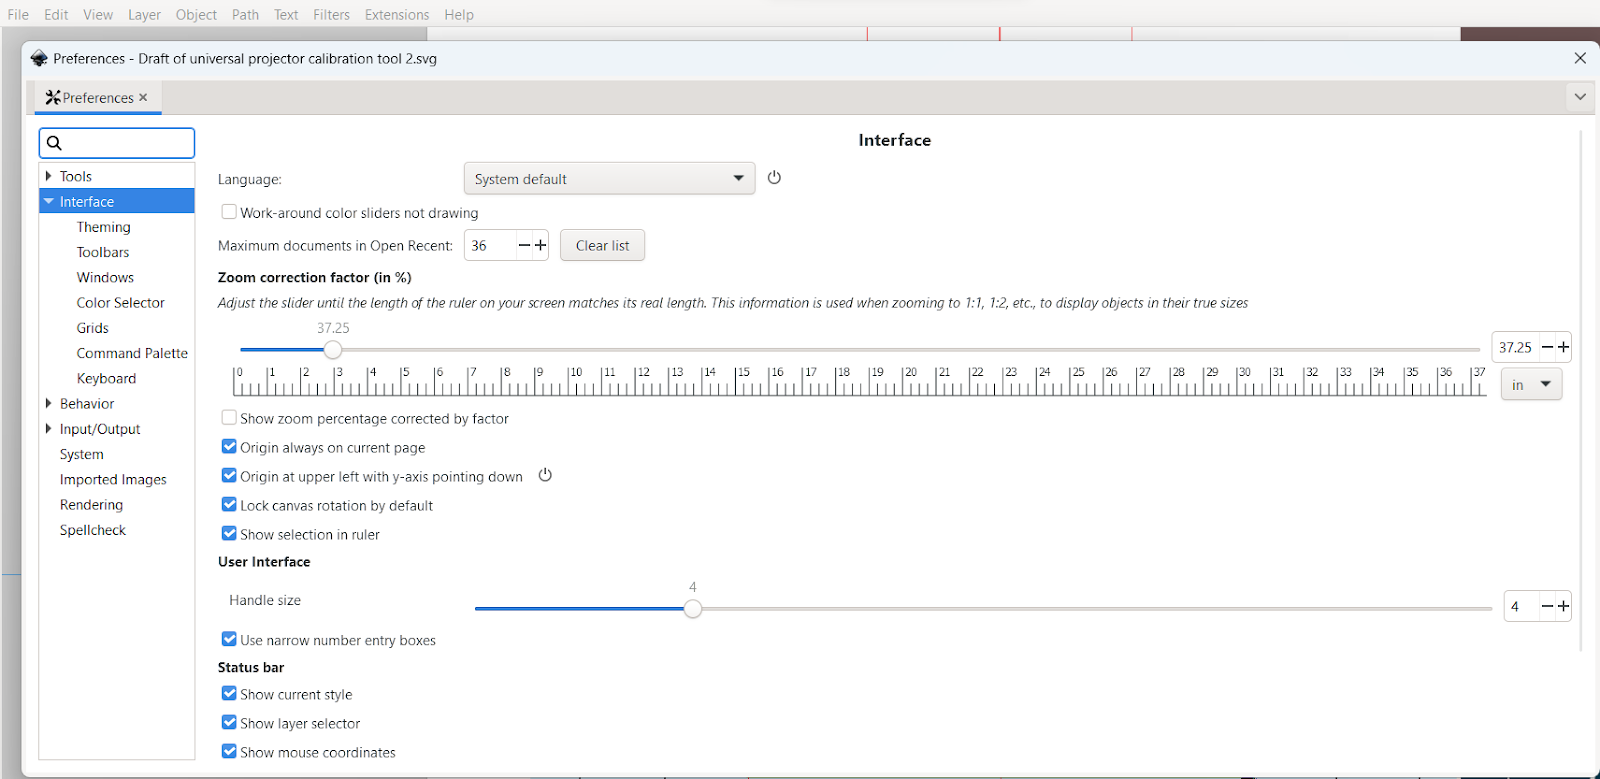
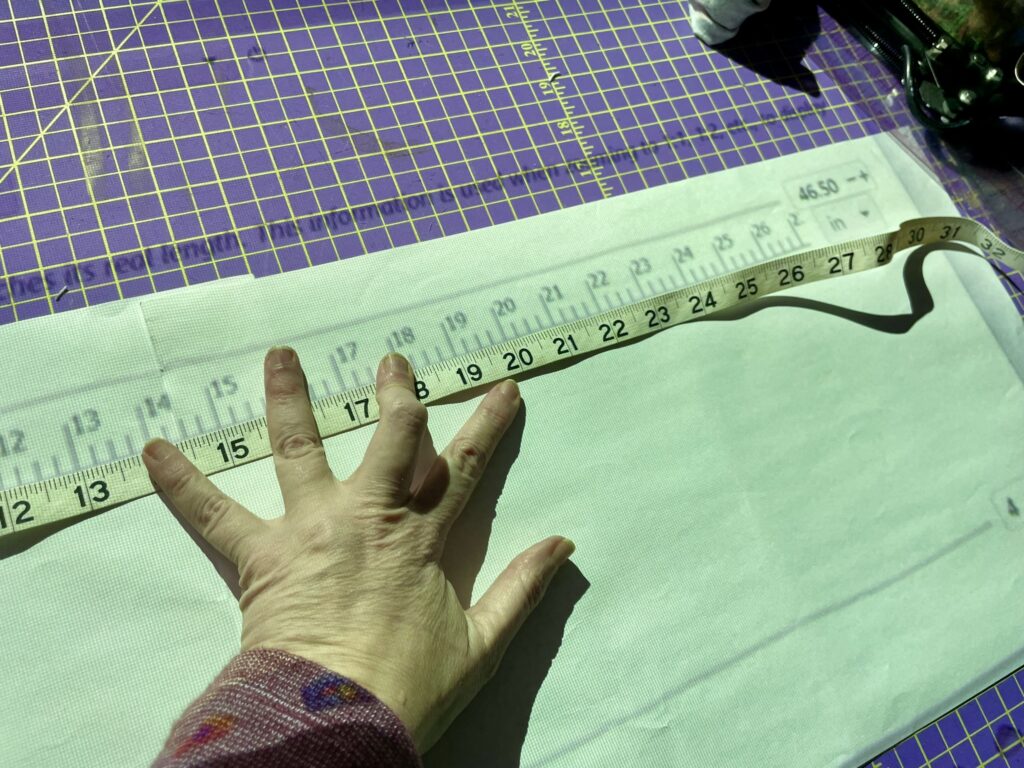
Step 2) Now increase or decrease the zoom correction slider or type in the box on the right side of the projected ruler until the zoom correction factor creates a projected ruler that projects at the accurate size on your projection, as measured with your tape measure or grid on mat:
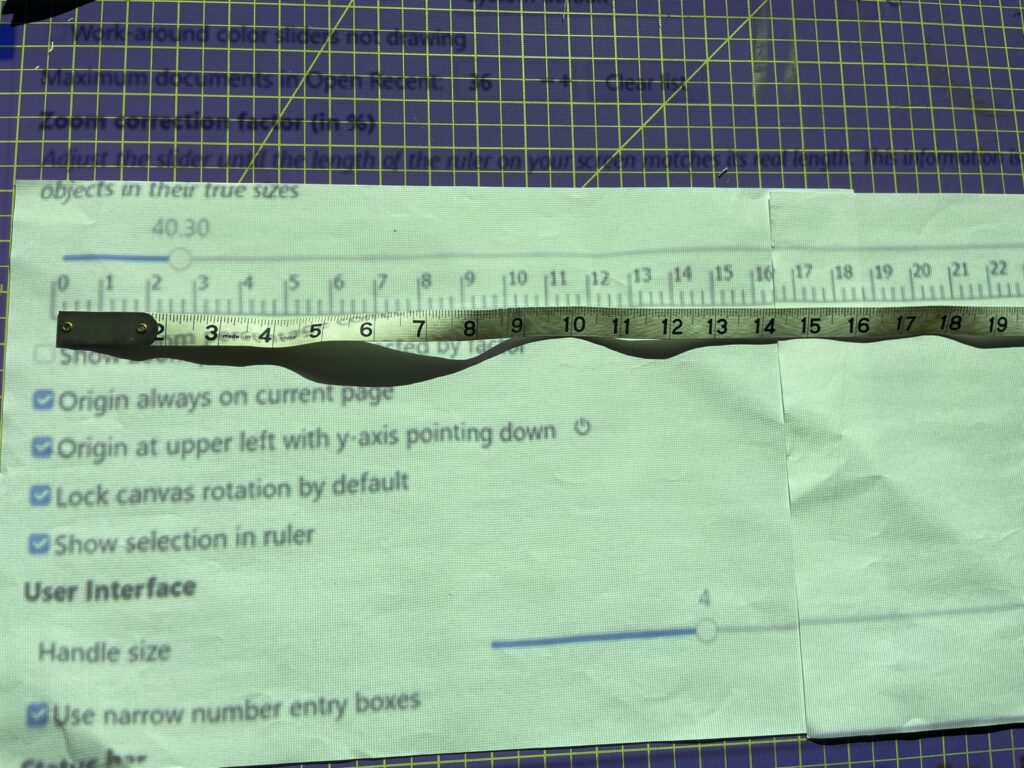
Step 3) Once the projected ruler measures accurately, close the Preferences window (click X in the top right corner), then that “zoom correction factor” is your calibration zoom. Inkscape now uses this “correct zoom” to be your “1:1 zoom level”, which you can quickly access via menus or even better by just typing the number 1.
Step 4) Also open the Squares and Rectangles Calibration Tool in Inkscape to further confirm your “1:1 correct zoom” is fully accurate.
| Tip for downloading SVG files: Since these are SVG files liked above, they will not open like a regular PDF. Depending on your browser they may open like a text file. Look for the Download icon, at the top of the browser so the file goes to your Downloads folder. Then go to Inkscape, and choose in the menus File > Open and navigate to the Downloads folder to find it and open it. (You can then save it to a different location if you like.) |
As with calibrating in Adobe, it is important to remember that all PDFs have the same scale (unless they are corrupted). This feature of PDFs is why PDF patterns are always printed at 100% scale, no matter the pattern designer, or page format. The same concept applies when projecting, all pdfs will project at an accurate scale if they are projected at your calibration zoom, no matter the pattern designer, as long as your calibration is accurate.
***Measuring the projected test square each time you cut is always recommended as a double check that no error has crept in along the way.***
Specific parts of the workspace that are used for projector sewing include the bottom right corner of the screen, which has these items on the status bar:

Page: here you can change pages if the file has multiple pages
X and Y: coordinates of where the mouse is on the canvas/page. Beginners don’t need to use this.
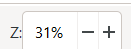
Z: Zoom level – this box will accept and change the zoom level in 0.1% level of accuracy increments, but the screen will always round to the nearest whole number. This is a feature request that has been sent to Inkscape, that future updates allow not just changing zoom in small increments, but also seeing that decimal zoom on screen. In addition, there is a bug when entering a decimal number that it only seems to register the change after typing a whole number. For these reasons, Section 7.0 has better steps for calibrating in Inkscape than the regular method of typing numbers in the zoom box.
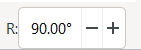
R: Rotates the entire PDF page. Enter the angle you want to rotate by. “Right way up” is 0, so to rotate from portrait to landscape orientation, enter 90. Press return and the page will be rotated. Negative numbers can be entered to rotate in a counterclockwise direction. (In section 11.2 of this guide, the steps to rotate individual pieces instead of the entire page will be explained.)