WIth the new auto-calibrating softwares available, such as Pattern Projector (which like Inkscape is free), for most people it will be easiest to export from Inkscape any modified file as a PDF and then continue to project from Pattern Projector because the calibration is so easy and almost automatic in that software.
But if you have previous used the manual calibration method with Adobe, then you could change to projecting from Inkscape, and the only change would be to find your calibration zoom in Inkscape. So the following steps assume you have manually calibrated in Adobe, and everything is accurate there. This is not a full calibration that you will be re-doing in Inkscape, it is just adjusting the zoom level for your calibration tool to be accurate in Inkscape.
To calibrate in Inkscape if you have already manually calibrated in Adobe:
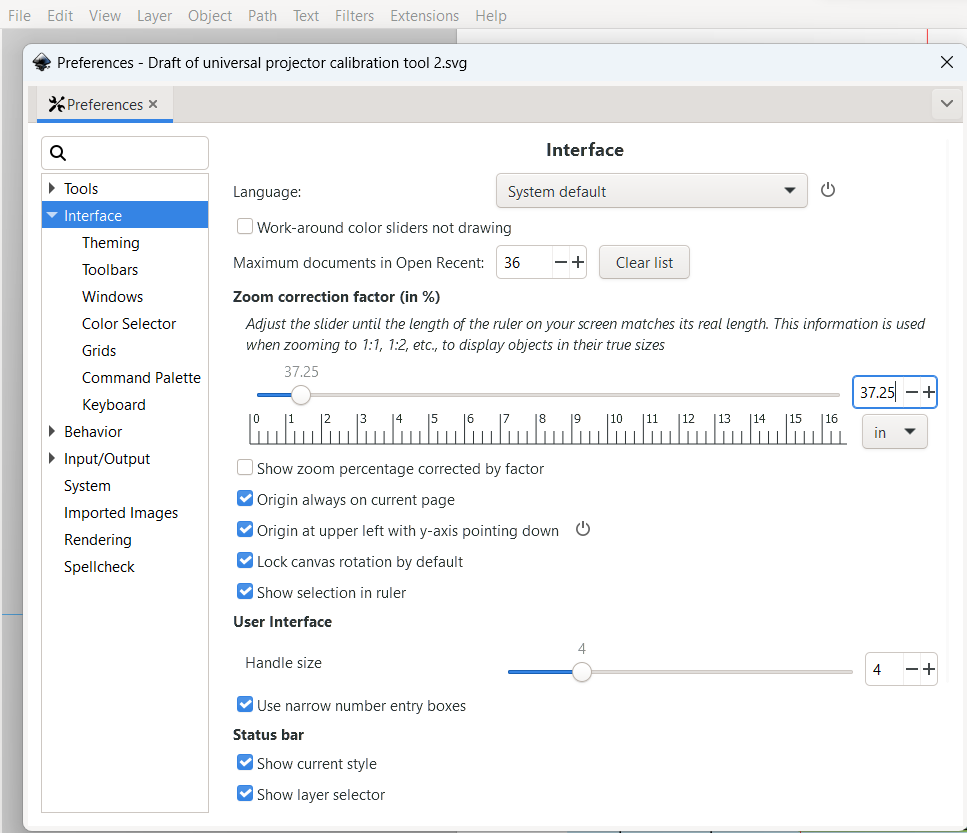
Step 1) Begin by using menus to navigate to Edit > Preferences > Interface.
- Here you will see this box of options with a ruler and a “zoom correction factor”.
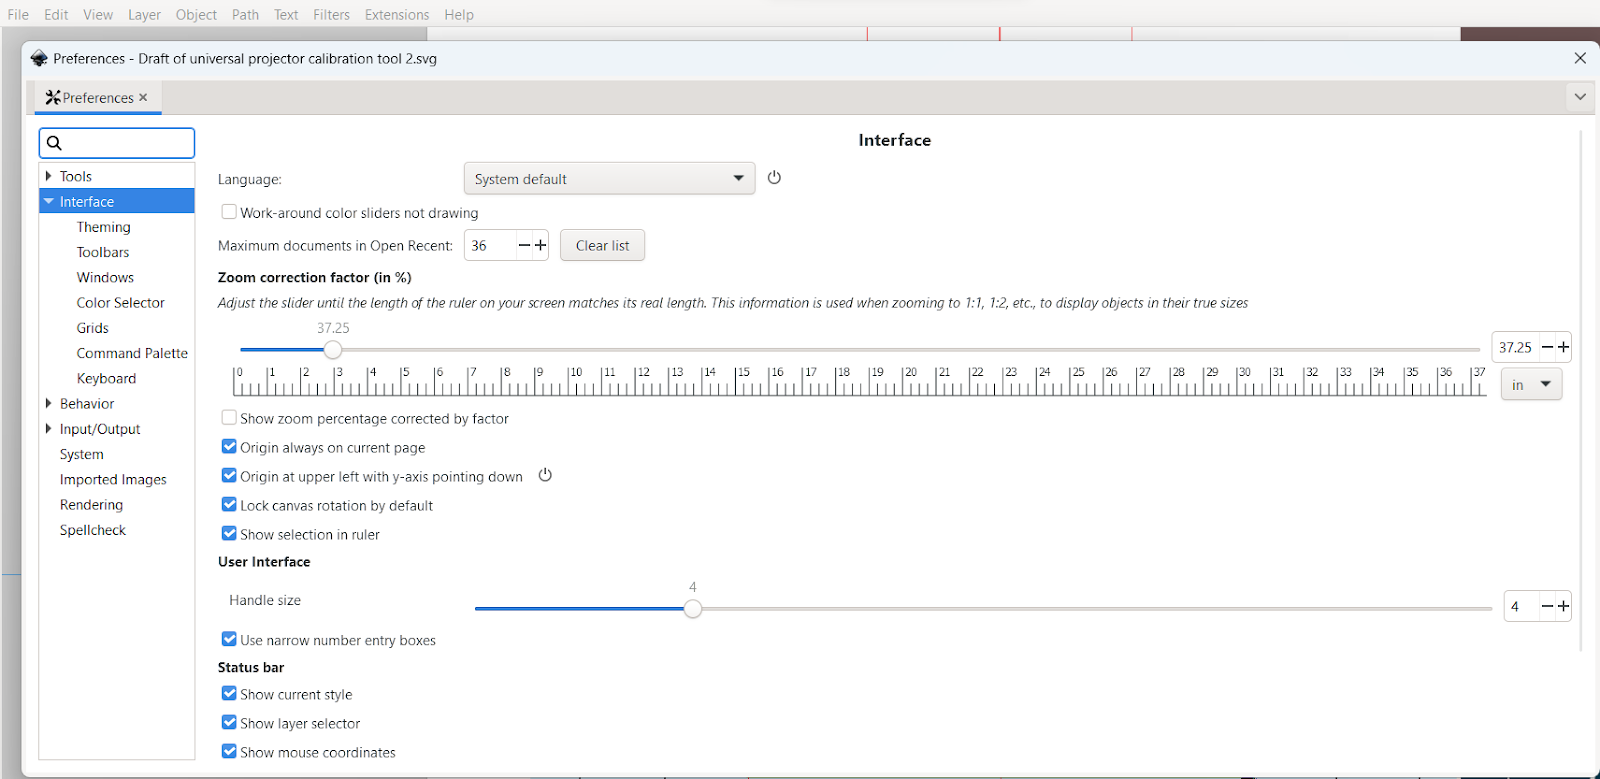
- Put the cursor on the right side of this window until arrows show that you can extend the window to be a larger size, then make it almost as wide as your screen, watching the size of the ruler on your projection. After resizing the window, it will look something like this:
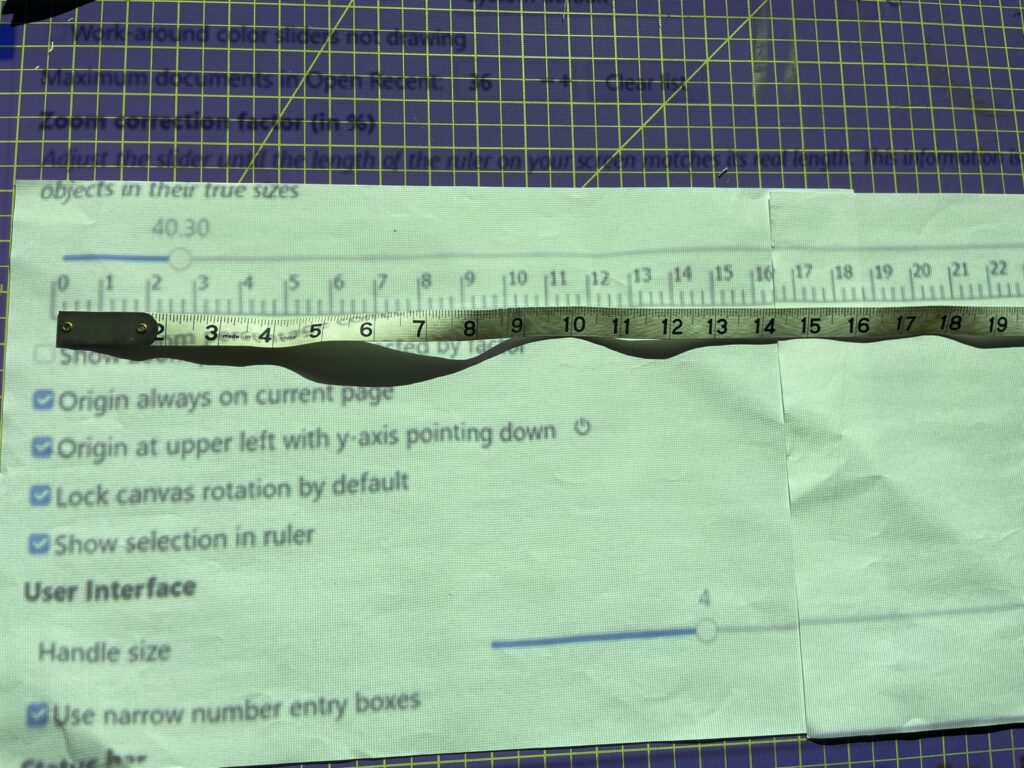
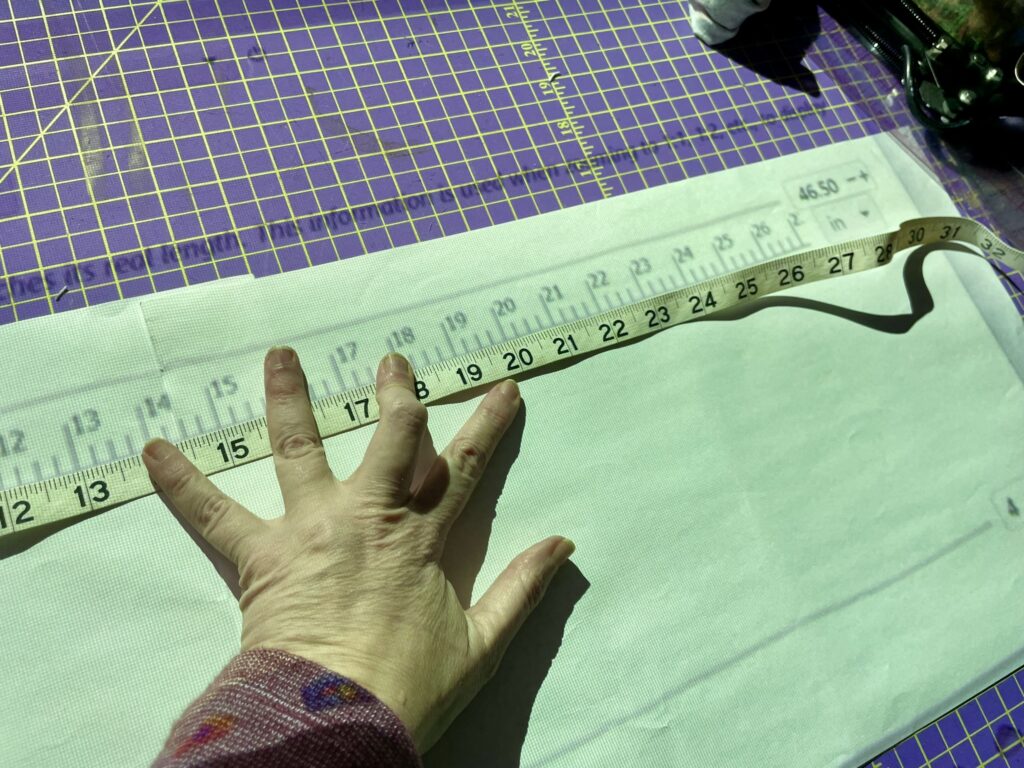
Step 2) Now increase or decrease the zoom correction slider or type in the box on the right side of the projected ruler until the zoom correction factor creates a projected ruler that projects at the accurate size on your projection, as measured with your tape measure or grid on mat:
- You can change from cm/metric to in/imperial ruler with the drop-down menu option at the right end of the ruler.
- This step is easier if you put paper or solid fabric on top of mat, and use a tape measure, otherwise grid on mat adds too many lines to see projected ruler clearly.
- If using mat grid, you can move the Inkscape window on the screen until you see projected ruler lines align with mat grid lines, and keep adjusting the zoom correction factor, and ruler location on the screen, until you see good alignment between measurements on the ruler and same distances with grid lines on your mat.
- Or you can use a physical ruler or measuring tape to measure the projected ruler, adjusting the zoom correction factor until the projected ruler is accurate.
- Adjusting zoom correction factor to be accurate to a distance of at least 20″ / 50cm is recommended.
Step 3) Once the projected ruler measures accurately, close the Preferences window (click X in the top right corner), then that “zoom correction factor” is your calibration zoom. Inkscape now uses this “correct zoom” to be your “1:1 zoom level”, which you can quickly access via menus or even better by just typing the number 1.
- When you type the keyboard shortcut of 1, you will then see the zoom level on the Z box in the status bar on the bottom right change to be your “correct zoom”/”calibration zoom”.
Step 4) Also open the Squares and Rectangles Calibration Tool in Inkscape to further confirm your “1:1 correct zoom” is fully accurate.
- Open the calibration tool on a regular basis to determine or confirm that the calibration zoom remains accurate. Here are the tools in SVG format to directly open them in Inkscape (or you can import the PDF versions from the Setup and Calibration guide). Remember to press 1 each time to set your zoom to the 100% / 1:1 zoom correction factor.
- Calibration tool in inches: https://bit.ly/svgcalibrationtool-inches
- Calibration tool in metric: https://bit.ly/svgcalibrationtool-metric
| Tip for downloading SVG files: Since these are SVG files liked above, they will not open like a regular PDF. Depending on your browser they may open like a text file. Look for the Download icon, at the top of the browser so the file goes to your Downloads folder. Then go to Inkscape, and choose in the menus File > Open and navigate to the Downloads folder to find it and open it. (You can then save it to a different location if you like.) |
As with calibrating in Adobe, it is important to remember that all PDFs have the same scale (unless they are corrupted). This feature of PDFs is why PDF patterns are always printed at 100% scale, no matter the pattern designer, or page format. The same concept applies when projecting, all pdfs will project at an accurate scale if they are projected at your calibration zoom, no matter the pattern designer, as long as your calibration is accurate.
- Think of the 1 shortcut as “put my zoom to 100%”.
- When you use the 1 shortcut, you will see Z box in bottom right corner change to the Zoom Correction factor scale level, but rounded to nearest whole number.
***Measuring the projected test square each time you cut is always recommended as a double check that no error has crept in along the way.***