11.1 Selecting entire pattern pieces:
To proceed with the steps in the next sections you have to be able to select entire pieces, in your pattern file, using the Select tool (mouse arrow icon).
On some patterns, you can uncheck layers you don’t need and then entire pieces can be selected without further steps.
For many patterns a few more steps are needed before selecting your entire pattern piece will work. Try each of these actions, until selecting works to choose individual pattern pieces so you can move them:
- Hide layers that are not needed to be selected/seen (section 8.0)
- Unlock layers that may be locked, then pieces in that layer can be selected (section 8.0)
- Check status bar for information about groups. Choose in menus Objects > Ungroup to ungroup objects so each can be selected individually. Keep ungrouping until status bar says “No groups” (section 10.0)
- If selecting only selects a part of pattern piece, then shift select all the objects that make up the pattern piece, and then choose in menus Objects > Group (section 10.0)
- If object or paths still cannot be selected, it is likely that the pattern is not actually digitally drawn as vectors, instead it is a static image of the file, and can’t be manipulated in a vector program. You will need to retrace the lines using the pen/bezier tool which is a fairly quick process. A link to Marta’s video tutorial for this is in section 15.0.
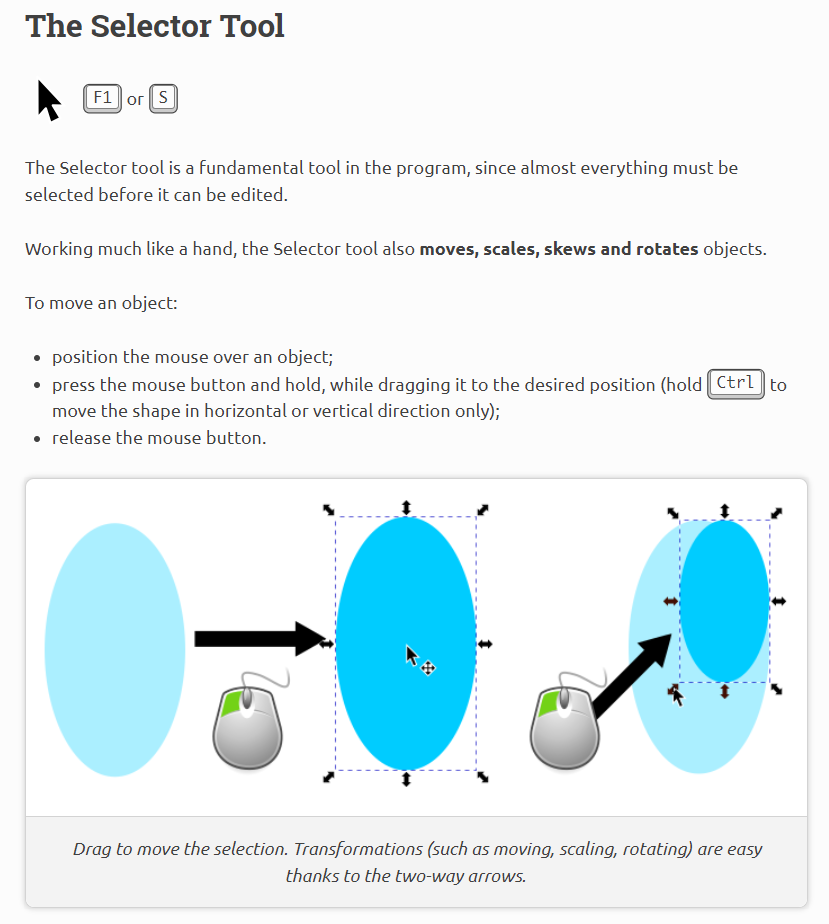
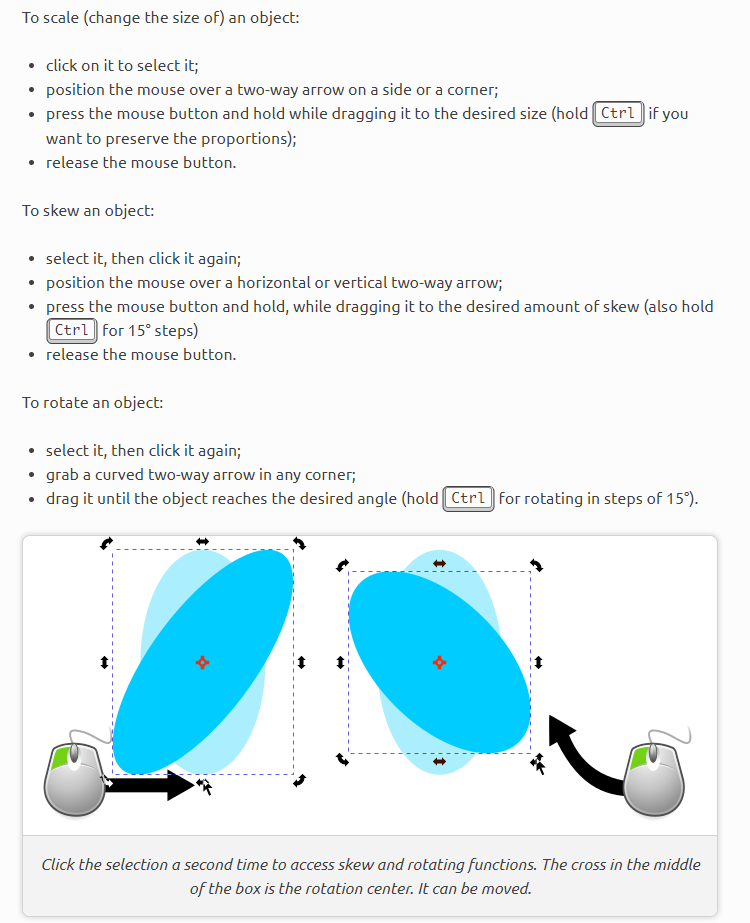
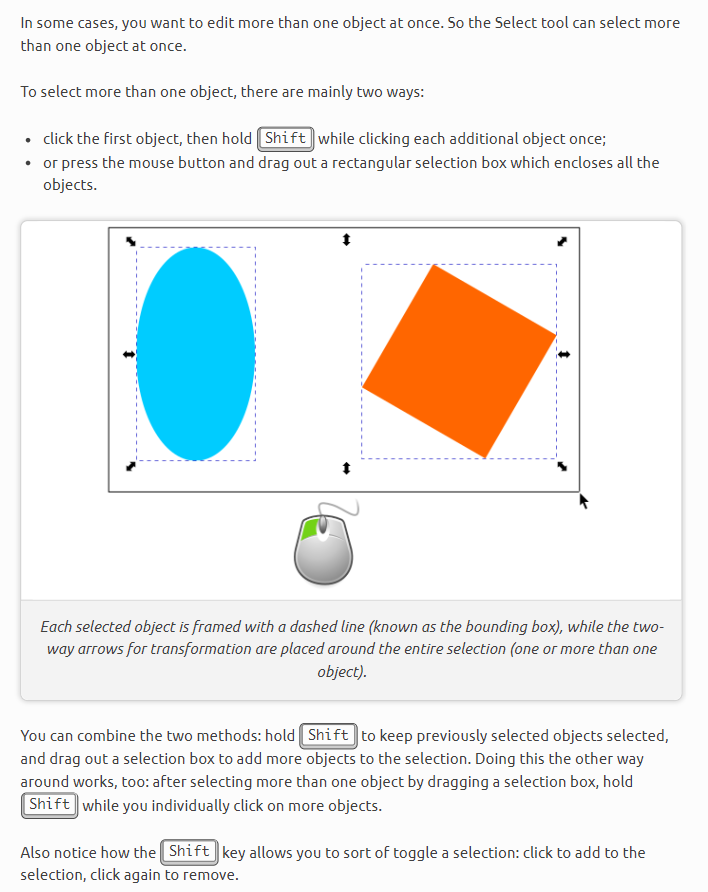
11.2 How to select objects, move and rotate pattern pieces
From The Selector Tool — Inkscape Beginners’ Guide 1.0 documentation (inkscape-manuals.readthedocs.io):
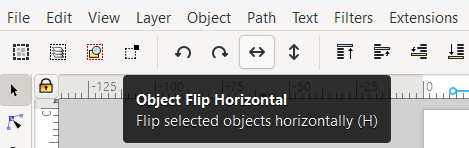
11.3 Toolbar shortcuts to rotate and mirror pieces:
When an object is selected the top Tool Control Bar will show these icons – the circle arrow icons are for rotating, and the side-to-side and up-down arrow icons are for flipping/mirroring objects.
For readers who are already have experience cutting using Adobe with their computer and projector, you can now proceed to Part B.
If you are new to cutting with a projected pattern, this is a good time, to start cutting a first small pattern, and putting in practice the information just learned in the previous sections.
Steps to cut your pattern:
- Using the information from previous sections:
- Open your pattern (section 2.0)
- Open layers panel (section 8.0) and select the size you want to cut
- In the status bar, enter your calibration zoom (type in the Z box), and rotate pieces if needed so longest side of pattern piece is aligned with longest side of projection (type 90 in the R box in bottom right status bar to rotate in clockwise direction). (Steps to use zoom and rotate in status bar are in section 6.0)
- Then go in full screen mode (section 7.0)
Now your pattern should look something like this on your screen, and on your projection:
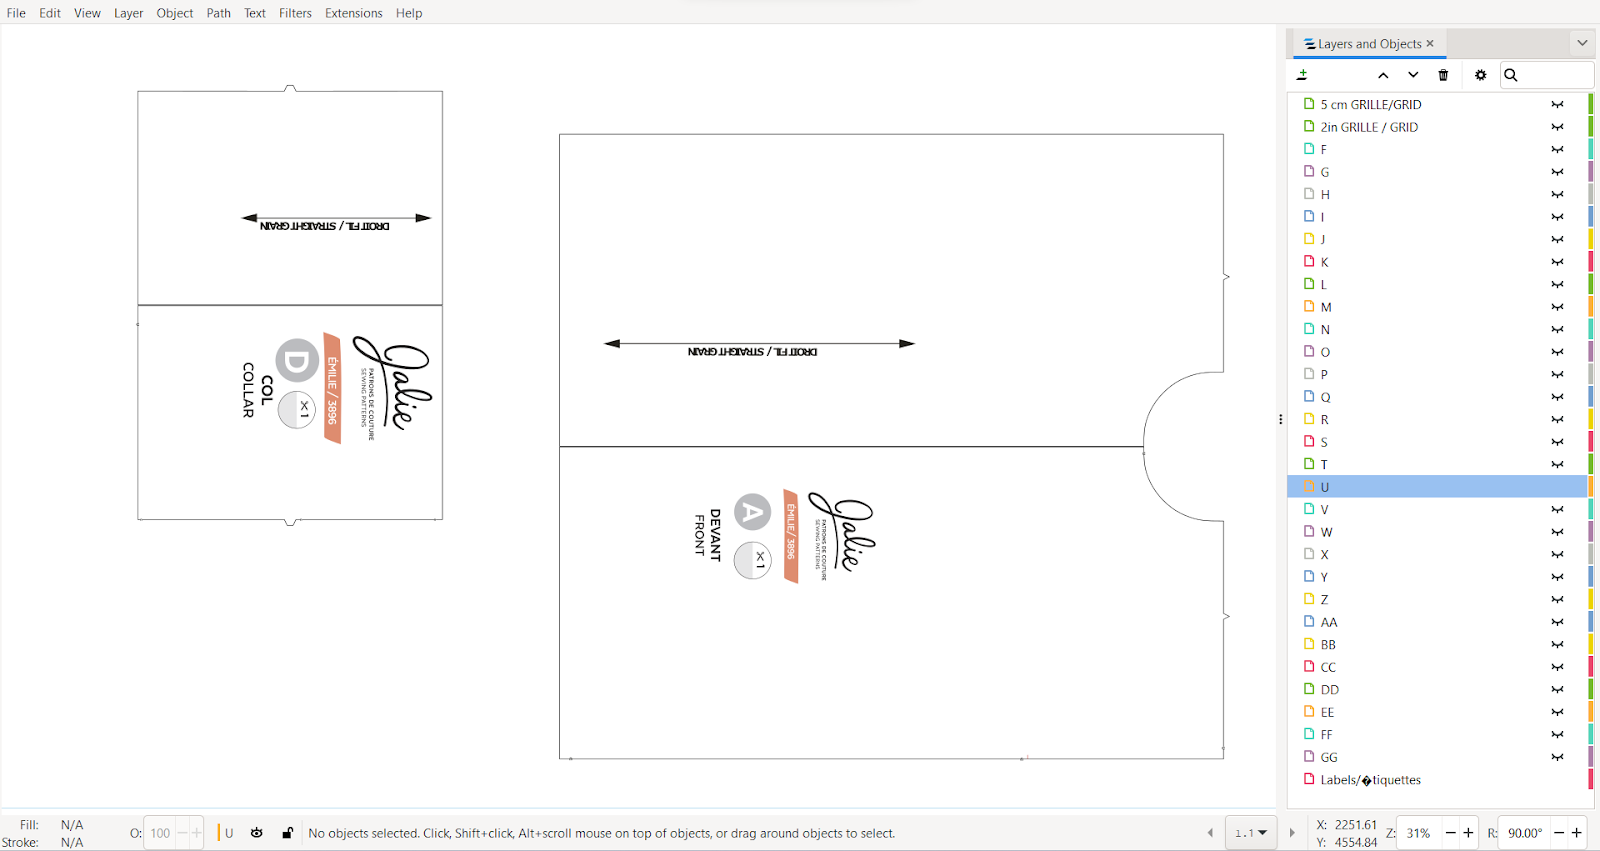
(if you want to follow along with this pattern, this is the free Emilie pattern from Jalie.com).
- Now you can cut!
- The most common and simplest way to cut on projector is one piece at at time.
- Cut one piece, then scroll projection, so that next piece is where you want on fabric, then cut second piece.
- To scroll projection, we use keyboard arrow keys, pressing Control at same time, to move pieces across the screen (section 5.0) to move pattern piece where we need it.
- Depending on size of table/mat and size of projection area, you will likely need to reposition fabric as well between cuts. Keep grainlne aligned with mat grid line, and projector file will have grainlines in that direction as well, making the task of keeping on grain easier.
- If layers panel is in the way when cutting, press the x at the top of layers panel to remove it from the view.
3) Keep cutting with these steps and do the same for all your patterns. Once you feel comfortable with these steps you can move on to the next sections. In particular section 11.0 How to improve visibility of lines and section 12.0 Grouping and Ungrouping Objects will be helpful to get lines to be thicker if needed, and moving objects if you need to (but just scrolling projection in steps above is simpler and quicker in most cases, so it’s fine to stick with that method).