Mirror your device/computer screen to projector
Once you have your projector, before setting it up, connect it to the computer/device you will be projecting from.
“Mirroring screen” is also called “Duplicate”, or screen sharing, and allows projector to show what is displayed on your computer/or device screen. Then you can open patterns on your computer or device and they will also show up in the projected image.
Connection between projector and computer/device can be done either by:
- HDMI cable
- the wifi feature available on many mini projectors
- or by a Chromecast or other casting device (Firestick, Roku or Apple TV for example) which connects to projector’s HDMI port and makes any projector wireless. For help understanding wireless protocols and choosing a casting device, see the info on this page: Wireless connections to a projector.
No projector can screen mirror via Bluetooth. Bluetooth capability on projectors is for sound only.
Any computer/device can connect to a projector, projectors just are a second screen for computer/device. Some computers/devices work best with some connection methods:
- iOS devices (iPhone/iPad) can connect by HDMI cable, wifi capability of mini projectors, or casting devlice like roku or apple TV.
- Macs can connect with any of those methods, as well as via chromecast.
- Google Pixel phones work best with a chromecast and won’t connect with the wireless capability of a mini projector (which work with Miracast compatible devices like Windows and Android devices, and Airplay/Apple devices.
The steps for each type of connection are listed here – tap header to see info for each:
Connecting projector to device/computer via HDMI cable – simple and reliable
Connecting by HDMI cable is simplest and most reliable option. It works for computers, or mobile devices (phones or tablets). It works especially well with UST (ultra short throw) projectors like Epsons, because they are set up so close to table. A 10 foot HDMI cable is often sufficient.
Some computers or devices may need an HDMI cable or adaptor that connects to port on their device, for example:
- a newer Mac, iPad or iPhone and many android devices will need a USB C to HDMI cable, or USB C to HDMI adaptor and HDMI cable.
- an older iPhone or iPad will need a Lightning to HDMI cable, or Lightning to HDMI adaptor and HDMI cable.
- An older Mac will need a mini-display/Thunderbolt to HDMI adaptor and HDMI cable.
Once you have projector and computer/device connected by HDMI cable, follow these steps to mirror your screen:
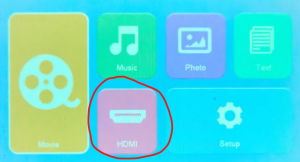
1. Make sure Source menu on projector is set to HDMI. This will be different method on different projectors. On Epson projectors, press source button on projector or remote. On mini projectors, choose HDMI in the main menu screen:
2. Mirror device, with these settings:
- On Mac, mirroring usually happens automatically. If it doesn’t go in System Preferences > Displays, and set projector to Mirror mode.
- On Windows, press Windows key and P, and select Duplicate in the panel that appears on right side of screen.

- On mobile devices, HDMI cable will automatically mirror device screen to projector (once projector source is on HDMI) (Exception: Google phones will not work natively with HDMI cable, they need HDMI port hub to mirror projection, more info here.)
Connecting projector via wifi capabilities of a mini projector
For wireless connections in mini projectors that have that option, they can connect to most mobile devices and computers with the following steps. Keep in mind wireless capabilities of projectors can sometimes be flaky/unreliable, especially if wifi router is far from projector, or if computer/device has very high resolution. Connecting by cable or chromecast/apple tv or other casting device, is more reliable if problems occur with wireless feature of projector. There is also a solution for using wireless connection on mini projectors if it freezes: Using extended mode to fix screen freezing issues when casting wirelessly from mini projectors.
To connect via wireless capability of projector:
- Follow instructions in manual to connect the projector to your home wifi network.
- On the Yoton projector, the screen to type the wifi password has an odd looking enter button on right side with an arrow. Select that button after typing the password to your wifi network.
- On Magcubic projector, select “Settings” on main menu screen and then “Network settings”
- Make sure you are connecting projector to same network as you will be using with your device/computer, not a different band or variation on the network name. (Some older projectors will not work on 5ghz band of a router, unless they were sold as “5G”. Yoton and Magcubic don’t have this problem they are 5G compatible.)
2. Follow instructions in manual for screen sharing. The projector instructions will only explain how to connect to mobile devices, but the wireless connection works with Windows or Mac computers as well. (They don’t explain those steps because they don’t want to provide support for connecting to a computer.)
To activate screen sharing on projector:
- One some projectors you will need to select “Screen Mirroring” or “Cast” button on main projector menu first, on projectors with apps you will need to select “Applications” or “Apps” button
- Then for Windows or Android devices select “Android” or “Miracast” or “Miracast Receiver”, for Mac or iPad/iPhone select “iOS Connect” “iOSCast” “Airpin” or similar.
- For Magcubic projector to connect to Mac or iOS devices, first time setup you will need to select “App Store” button on main screen, then scroll down to “Airpin” (may also be called “Airpin Pro”), and select that and select “Install” button to add it. Then launch Airpin app, and select “Airplay” button. AirPin button will then appear at bottom on main menu screen of projector. If you see a message to exit app that has “Background” or “Confirm” buttons choose “Background”.
- For Magcubic projector to connect to Windows or Android, after selecting Applications button, select “Miracast Receiver” to add it to main screen.
To open screen sharing panel on computer/device:
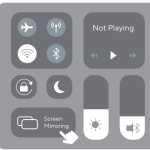
For iPhone or iPads: select “iOSCast” or “iOS Connect” or “AirPin” similar button. Then access control centre on iPhone/iPad (swipe diagonally down from upper right corner) and select Screen Mirroring button.
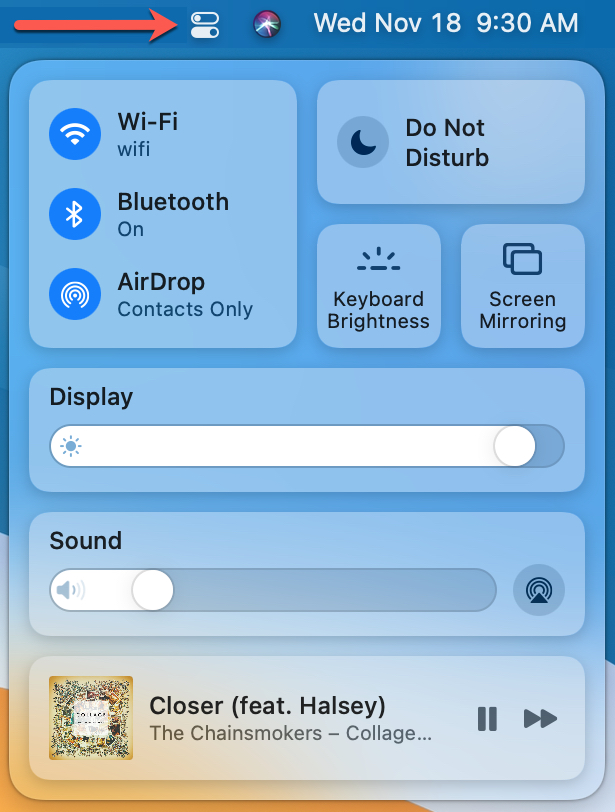
For Macs: select “iOSCast” or “iOS Connect” or “Airpin” or similar button. Then open Control Centre click “Screen Mirroring” and then select projector (may be called “Z-Cast” or “Y3” or “Mag” or similar). (On older Macs, look for TV icon in menu bar, and select that to look for airplay devices.)
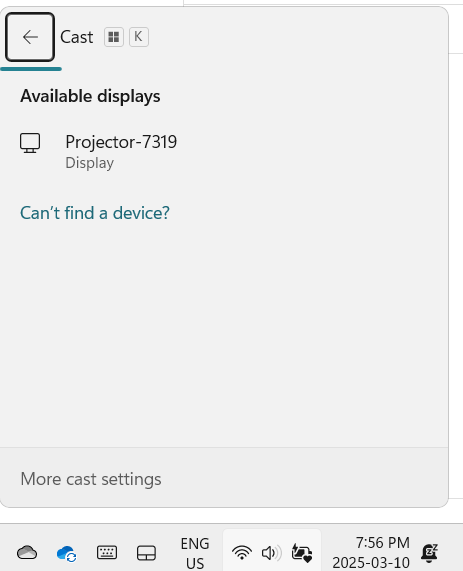
Windows 10/11 setup: press Windows Key and K (think of K for “Cast”). Then in the panel that comes up, select the projector, it may have name such as “Z-Cast”, “Y3”, “Projector-7319” or similar. (If Windows key and K doesn’t bring up panel, your computer may be older and not have wireless display capability.)
Connecting projector wirelessly to device/computer via Chromecast device
Any projector can be made wireless by adding a Chromecast device (any version, so older/cheaper versions are best) to the projector’s HDMI port. The Chromecast gets power by plugging into the USB port of the projector.
Using a Chromecast works well with Windows and Mac computers, or with Android devices.
With iPads or iPhones, you need a paid app to allow screen mirroring. For these iOS devices, only and Apple TV added to projector can mirror screen wirelessly without a separate paid app. Older, much cheaper, versions of Apple TV will work for our needs, and eBay and other online or local second hand marketplaces are good places to find these older Apple TV devices cheaply.
Steps to Screen Mirror with a Chromecast
- You set up the Chromecast on your home wifi network via Google Home app on a mobile device (can’t be done on a computer).
- Then you screen mirror your computer to the projector, by opening Chrome browser, and using the “Cast” option in the menu. Scroll all the way down to “Save and Share”, click that and you will see “Cast”. Right click on screen is another way to access “Cast” option.
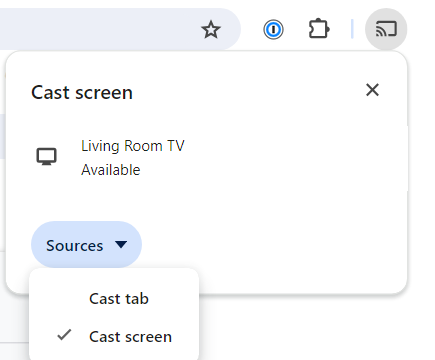
- In the Cast menu, under “Sources” change from Cast Tab to Cast Screen. Then select your Chromecast under Devices. This order is very important. You can’t switch from casting tab to casting desktop while it is casting. You need to activate device after choosing Cast Screen.
- When “Casting Screen”, you have to accept the confirmation message to allow screen mirroring. Occasionally, that popup window is blocked – check near your address bar to allow that popup.
Connecting projector wireless to device/computer via other casting devices
(Firestick, Roku, Anycast, Apple TV, etc.)
First see this post to understand which casting device will work with which devices:
https://sashasewist.info/wireless-connections-to-a-projector/
iPhone and iPad will need Apple TV or Roku casting device, or any other casting device that has AirPlay. Firestick does not have Airplay.
Plug the casting device’s HDMI cable to the HDMI port of the projector. Casting device will need to be plugged in for power, if it has a usb cable plug that into USB port of projector and it will get power from projector.
Then follow instructions for the specific casting device on how to screen mirror with it.