
Wireless casting on mini projectors is designed for iOS and Android devices, and can often work with Windows or Mac computers even if it’s not a supported feature. But when used on computer, there’s a risk of unreliability of this feature. Sometimes the issue is related to screen resolution, or poor wifi network coverage/long distance from wifi router to projector.
The most reliable solution is to change to HDMI connection, either by HDMI cable, or adding a casting device to HDMI port, like a Chromecast, or Apple TV, firestick or Roku, if wireless connection is preferred. But continue below for another solution.
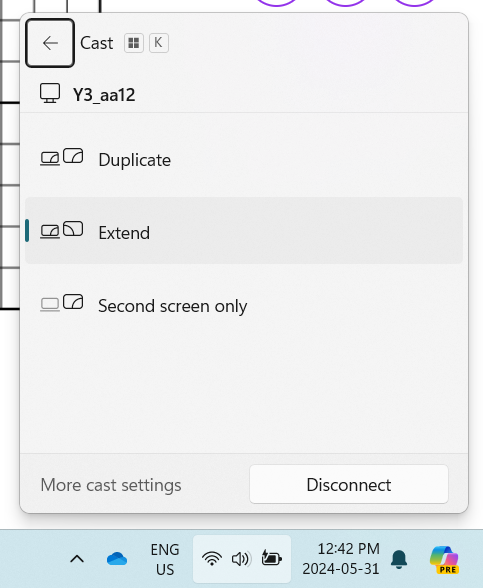
One fix that seems to work for many is to change from “Duplicate”/”Mirror” mode to “Extended”/”Separate Display” mode. When mirroring/duplicating screen, projector has to adapt its image to the computer screen’s image resolution and shape, which can add too much data for wifi network or projector to handle. The change to full screen mode on computers when calibrating or projecting patterns seems to be particularly troublesome, and cause freezing.
In extended mode, the computer and projector share a large desktop, and you can move mouse and windows from one side of desktop to the other, to move between computer screen and projector. And crucially, extended mode allows projector to retain its own image shape and resolution, so it is much less intensive type of screen casting, and seems to be good solution for stopping the freezing problem.
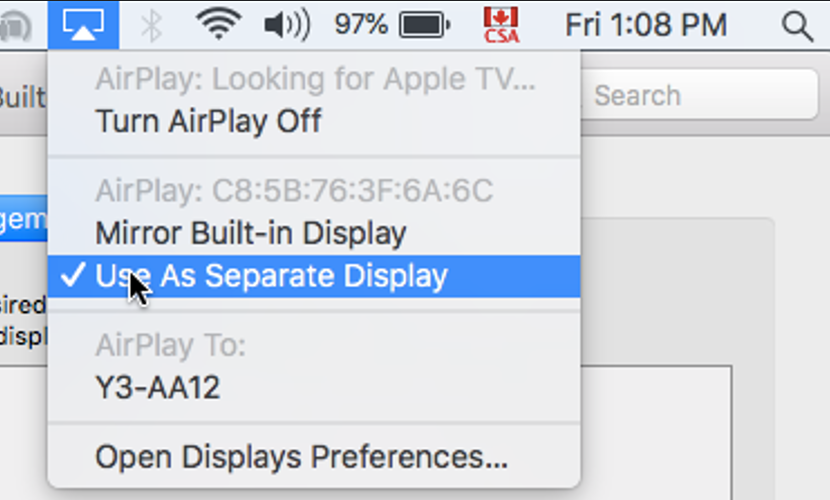
How to change from “Duplicate”/”Mirror” mode to “Extended”/”Separate Display” mode
Here are pics for how to setup Extended mode in Windows and Mac computers:
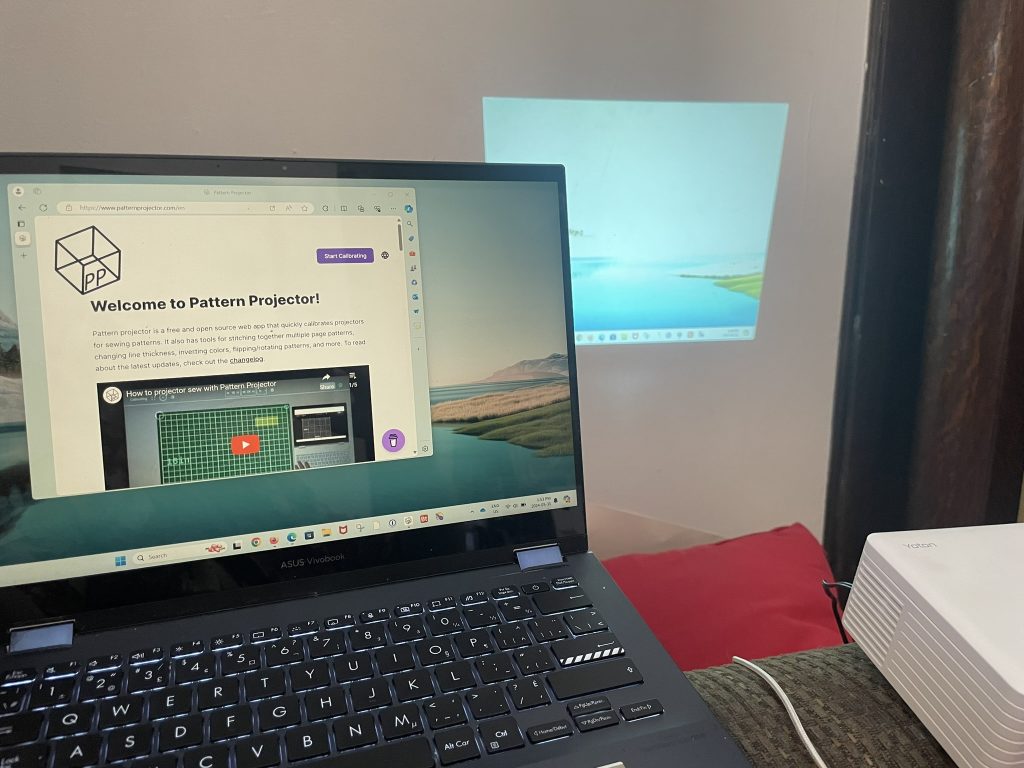
When you first enable Extended/Separate Display mode, you will see picture of your desktop on your projection, and then you have to move windows to that part of the desktop to see them on your projection.
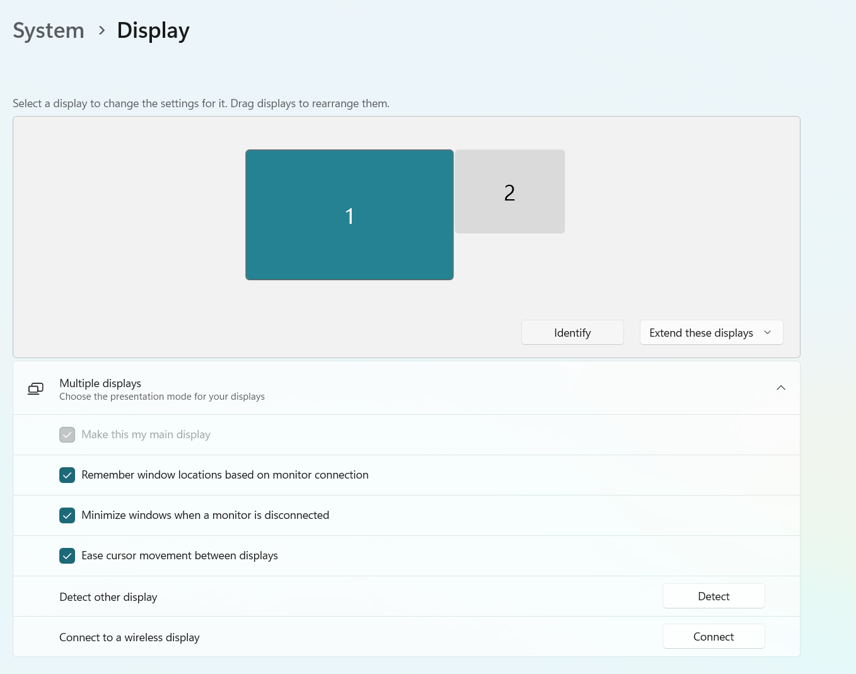
By default, the two screens will be setup with main computer screen on left side of desktop and projector screen on right side of desktop. If that is the orientation of your screens physically, then you can leave this default setting.
How to move extended display to other side of main screen
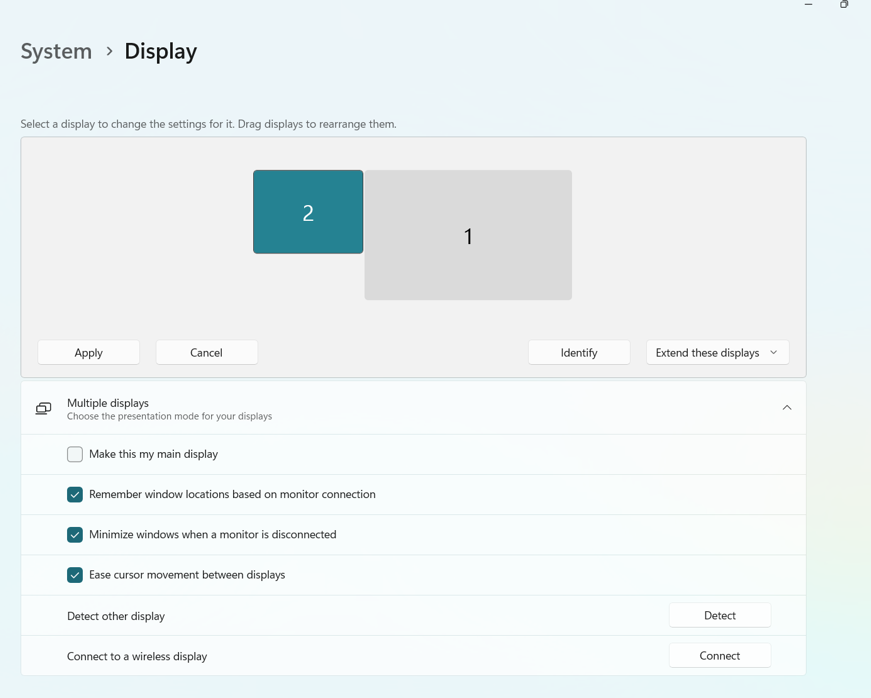
But if your computer screen is physically on right side of your projected image, it will be easier if you change the setup of the screens on the computer to have computer display on right side of projector screen.
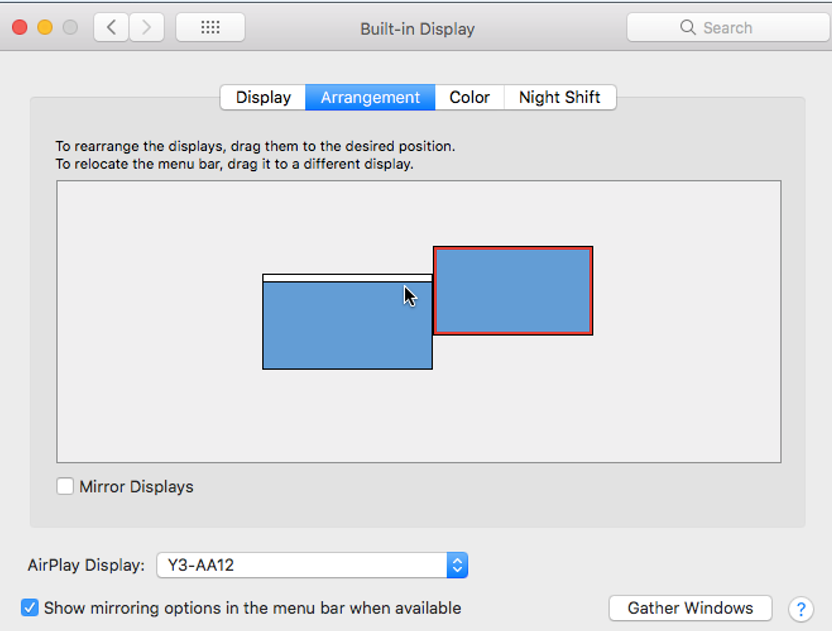
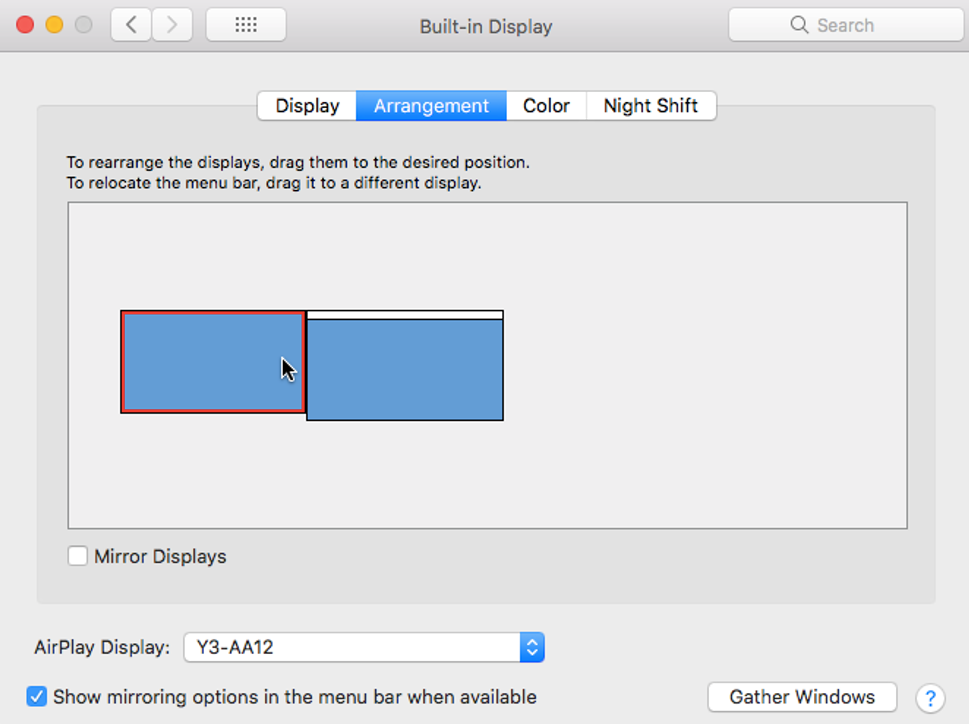
To do that you go in Display settings on Windows or Mac, and drag with the mouse “Screen 2″/Projector screen to move it from right side to left side of main display. These pics show how:
How to move window from main display to projected display
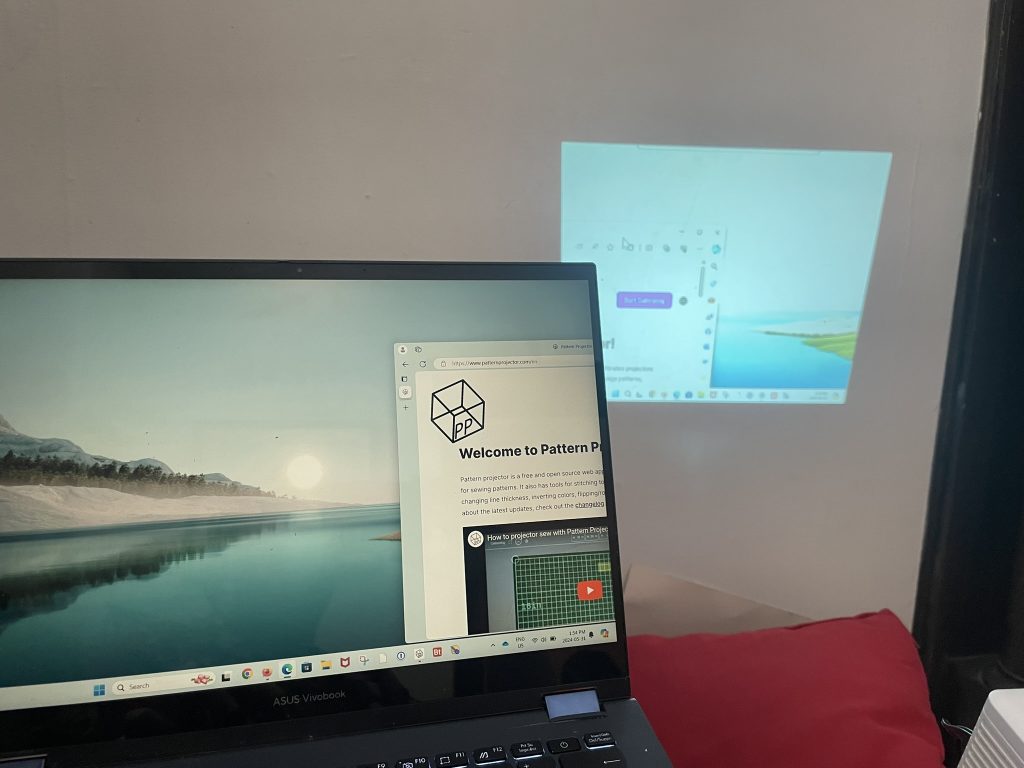
Once the two displays are side by side in the way that makes sense for your setup, you will move the window with app that you are using to project patterns from your computer display to projector display, by dragging window with mouse to the side where the displays join and you will see window you are dragging to now appear on projected display:
It takes a bit of practice to keep track of mouse when in Extended mode. Sometimes mouse goes too far on one side of screen and ends up in other display and seems to be “lost”. Going in system settings to increase the size and/or colour of the mouse pointer helps make it easier to find if ever this happens.
If you have any questions or challenges with these steps, post your questions in Projectors for Sewing Facebook Group.