This guide includes tips for using the new Pattern Projector, or Project & Cut software tools.
(Older version of this guide, for tips when manually calibrating and using Adobe to project patterns available here: https://bit.ly/ProjectingTopTips )
Following the steps in the One Page Guide to Projector Sewing, and after Choosing a projector, Connecting it, and Setting it up, now it’s time to calibrate and use it.
Talented members of the Projectors for Sewing facebook group have created software to make projector sewing the quickest and easiest way to cut patterns. These tools automatically calibrate image cast on your mat/table to be accurate, based on measurements you enter. And they both include PDF projecting tools, that make projecting patterns easier than ever, including tools to reverse the colours for better visibility, rotate and mirror, turn on and off size layers. They each work in similar ways, and have videos on the homepage of their website that demonstrate how to use them.
- Pattern Projector A webbased, free, open-source tool by Courtney Pattison is available at www.patternprojector.com
- Project&Cut A program for Windows 10/11, MacOS 10.15+, or Linux computers by Clinton Blackmore, has a 21-day free trial, and a one-time $20 USD cost after that: www.projectandcut.com
See also these videos on Dailey Sews & Stuff – YouTube:
- Introducing: Pattern Projector, Walking through the new app (youtube.com)
- Introducing: Project & Cut! Previewing the New App (youtube.com)
- Interview with Courtney Pattison of Pattern Projector (youtube.com)
- Interview with Clinton Blackmore of Project & Cut (youtube.com)
When calibrating with these new tools *Always Use A Measuring Tape* to measure calibration box and ensure measurements entered are correct. With so many lines on cutting mat, it is very easy to accidentally enter incorrect measurements, and measuring tape will catch that mistake for you.
When accurately calibrated, projected grid lines will match grid lines on mat, and calibration box will measure accurately. Most common reason for grid lines not matching up is calibration box measurements not double checked with a tape measure, or if lines are curved, are bowed in some places, that indicates mat/table has high/low spots.
If you don’t have a mat with a grid, an easy alternative to calibrate is to use the “grid of pages” method. Take 4 pages of printer paper, in North America, the pages will be Letter size (8.5″x11″), in the rest of the world they will be A4 size (21cm x 29.7cm). Tape them together so they form a wide rectangle, make sure the pages are exactly butted up against each other with no overlap. The rectangle of 4 pages will measure 22″ in width and 17″ in height if using Letter pages, or 59.4cm in width and 42cm in height if using A4 pages. Enter those measurements in the calibration box in Pattern Projector or Project and Cut, and then drag corners/sides of calibration box until projected calibration box exactly matches your 4 pages taped together.
If you have any concern that your calibration is not accurate enough you are welcome to post with a picture of calibration on your mat (or grid of pages) in the Projectors for Sewing FB group, and we can help you. Make sure we can see entire grid in the pic, and that room lights are on for best visibility of grid. Also, projecting the manual calibration tool PDFs in the software you are using, Pattern Projector, or Project & Cut, is another way to double check your accuracy:
Once accurately calibrated, you then use the Projecting tools in the same software tool to open your patterns, and and it will automatically project your patterns at accurate scale. Always double check by measuring projected test square.
All PDFs have the same scale and will be projected accurately when your calibration is accurate, so PDFs formatted for projector, A0/copyshop, A4/letter, or any size at all, can be used on projector.
However, some key differences in layout and features of PDF files make some much easier to use on projector than others, with info provided below for each format. Read below for info on each format and how to project them, or jump directly to Projector format, A0/copyshop files, A4/Letter/Print at home pages, or Tips to Digitally Assemble/Stitch pages to make a complete pattern to be projected.
It is worth checking your account on the pattern designer’s website to see if a better format is available, or ask in their group or by email if they are planning to create projector friendly files if they haven’t yet. It’s good to let designers know about this growing market.
Mary H. in the Projectors for Sewing FB group has helpfully made a list of designers who have projector-friendly patterns. If you know of other designers who should be added to this list, use the link in the introduction section of the document to send her info so she can add them. Here is the link to Mary’s list (Google Spreadsheet):
https://bit.ly/projector-friendly-patterns
Projector files are the preferred format we should use when available because they all have the most important features for using patterns on projector, which save us time, including:
- All pieces complete (none split across pages)
- Layers – being able to turn off sizes to just project the size(s) we need is key for projecting, otherwise it can be very hard to follow the line we want to cut.
- All pieces with grainline in same direction (this saves us from shifting our fabric unnecessarily). As well all pieces in same up-down orientation, so we don’t have to flip directional fabric when cutting. If folded pieces are included, all fold lines on same side.
- Larger text and thicker lines.
- Drawn rectangles for all cuffs, bands, etc. as well as measurements provided.
- Ideally projector files will include unfolded pieces (with fold line included for those who prefer to cut on fold), and two mirrored pieces provided as well.
List of recommended layout features for designers to include when creating projector files is available here.
A0/Copyshop files often can be used successfully on projector, especially if they have size layers included, so you can turn off unneeded size lines when projecting (all projector files have size layers, not all A0/Copyshop files do, although it is fairly common for them to have this feature). A0/Copyshop files may take longer to cut from because more fabric shifting may be needed if grainlines are not in same direction. Text size and line thickness may not be optimized for projecting. If they are not layered, it is worth checking if the letter/A4 size pattern has layers, and if it does, use tips below to assemble the pattern into a layered file ready for projector. If you have no choice but to use an unlayered file, one option is to hover a piece of paper ahead of rotary cutter to better see lines as we cut.
However if using Pattern Projector to project A0/Copyshop files, there are many tools designed specifically to make A0/Copyshop files easier to project, including a line width increase tool, an a line marking tool which allows marking on grainline of pieces and rotating PDF to be aligned with grainline of your fabric, and a text magnification tool (hover or tap text and it will be magnified).
If using Project and Cut, to change pages within the A0/copyshop file, in the P&C menu bar choose View > Layers and Pages. In the panel that opens, at bottom the buttons allow changing page.
If the A0/copyshop file has pieces that are split across pages, jump to tips for digital assembly of patterns below.
A4/letter size/print at home page formats usually need to be “digitally assembled” into a complete pattern before projecting, see tips for that below. For small patterns like bags or small accessories where pieces are all on separate letter/A4 pages, but not split across pages, there is no need to assemble them, each page can be projected as is.
Tips for digital assembling pattern pages, also called stitching, using Pattern Projector or PDFSitcher:
Two free programs can be used to stitch pages together: PDFStitcher (compatible with Windows 10/11 and Mac 10.15+ versions) or the Stitching function in Pattern Projector (web based, works on almost any device). do that is use the stitching function in Pattern Projector. PDFStitcher is a utility program where settings have to be adjusted without an interface to see pages assembled until new PDF is generated and downloaded, so Pattern Projector stitching function is easier to use because pages are seen on screen as options are adjusted. Below are the settings area common to both programs and how to use them to assemble the pages into a complete pattern for projecting
Stitch page range box. The default will be all the pages in the file. But this can be changed as needed, for example:
removing pages that aren’t needed in the layout, for example:
- if the first page of the file is the pattern layout map, start the rage range at page 2 instead of page 1. Or remove from the page range any tutorial pages before the pattern pages. As you change the page range box you will see pages move.
- if the pages need to be in a different order, then change the order in the page range box. If file has page 1-4 but need to be assembled in reverse order, then enter 4,3,2,1. (Using PDFStitcher, an alternative to doing that is to leave normal order for page range, and then use “right to left” and “bottom to top” options below page range box.)
- If page layout has rows with blank pages, and/or some rows that are shorter than others, then enter “0”, wherever needed in the page range box, and that will insert a blank page. For example, if file has page 1-5, but first row is pages 1-2, and second row is pages 3-5, then enter in the page range box: 1-2,0,3-5
Overlap/triming of pages to align pieces:
- In Pattern Projector, use the H and V boxes. The amounts are in pixels, and so may need to be around 25 or 50 to overlap the page as needed for alignment of pieces. The + and – buttons can be used, and/or typing numbers in the box. Pages will move on screen as amounts are changed.
- In PDFStitcher, the Right, Left, Top and Bottom are where amounts in inches or cm get entered to tell program how much margin to remove (option to set units to inches or cm are on that screen). For most patterns, trim or overlap option will give same result. And either equal amounts in R and L boxes or all in R box. And usually Top and Bottom settings just need to be set to the same as R L boxes. This spreadsheet has been used to share margin settings for many popular patterns. Unlike Pattern Proejctor, the pages are not seen on screen in PDFStitcher, so saving and then opening the resulting PDF is the only way to confirm that the settings are right.
- If pages are different sizes, the largest page size will be used. For some patterns, removing the pages that are different sizes will be needed. This free organize PDF pages online tool can be used to delete pages or rearrange them as needed. Or this free online Crop PDF tool is helpful to trim margins from pages when different pages have different margin amounts.
- If pages need to be rotated to align properly, PDFStitcher can rotate all pages with the “Rotate left” or “Rotate right” option. If different pages need to be rotated in different ways, or if using Pattern Projector which can’t rotate pages that are being stitched, use this free rotate pages in a PDF online tool to rotate pages as needed.
Saving the assembled PDF:
- In Pattern Projector, use the Export PDF button. This will save a separate PDF with the pattern assembled as you see it on screen. To continue with projecting of the assembled pattern, you don’t need to open the exported PDF, the assembly settings will remain in current PDF , when you click the arrow button on right side to close the stitching options.
- In PDFStitcher
One more tip when using Pattern Projector to stitch pages:
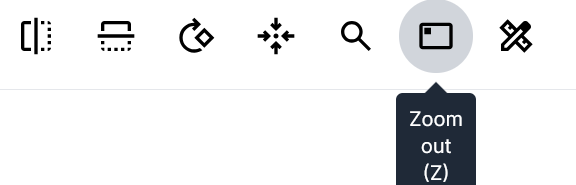
- To see all pages at once on screen when using Pattern Projector, tap the Zoom Out button in top toolbar (looks like a rectangle, next to magnify button). This is especially helpful when changing the Columns entry and page range entry, as those boxes are changed, the pages will move on screen, so you can test different settings to see which gives desired result.
- It is easiest to use a rotary cutter and self-healing mat. 28mm rotary cutter is good size for clothing patterns and will be easier to use than 45mm size. Rotary cutter with long handle (not the ergonomic style) will ensure shadows of hand and body are always behind where you are cutting. If needed, tipping cutter slightly will reduce shadows.
- It is possible to cut with scissors, but it is trickier as lines will move when scissors lift fabric. But with a bit of practice it can be done successfully. Cutting on a soft surface like a carpet can be helpful to allow scissors to go below fabric without lifting it, to minimize distortion of lines.
- Use painter’s tape to mark grainlines on fabric, then you can easily find them and align with mat grid lines and/or calibration grid. Use flashlight and/or stretch fabric if it’s a knit to find grainline.
- Piece of paper to hover over fabric when pattern lines are hard to see on busy fabric. Piece of paper can also help to read text projected on it.
- Quilting ruler, to place on fabric when adjusting patterns for height, to ensure we are scrolling projection by right amount of inches/centimetres (more info in Tip #7)
Always measure projected test square as a double check that pattern scale is still accurate. With the new auto-calibration tools pattern scale will automatically be accurate if calibration is accurate, but this quick step is still a recommended double check.
Most projector users cut on a single layer of fabric. This helps avoid cutting off grain as we can position fabric grainline perfectly aligned with pattern grainline, and not shifting will occur. It also reduces time folding and refolding fabric.
It is still possible to cut on folded fabric, but the projected foldline will distort when the fabric fold creates a bump of fabric at the fold line. To avoid this issue: 1) project pattern with fold line aligned on a grid line of the mat 2) then bring fold of fabric to be aligned with that fold line 3) press fabric fold line down with a quilting ruler so that fabric is more flat at the fold line.
Just like when cutting with paper patterns, we cut one piece at a time. When projecting, we scroll pattern to position first piece where we want it on our fabric and cut first piece, then we scroll the projection to position second piece, and cut that one, etc. If we run out of fabric under the projection to cut our next piece, then we shift fabric and then we can continue cutting and scrolling, and only repositioning fabric when needed. See Tip #6 below for making a cutting plan when using a projector to minimize fabric waste.
Make sure to use the tools in the projecting software, such as reverse colours function in Pattern Projector or Project & Cut for best visibility of lines. If text is hard to read, Pattern Projector has a hover function to magnify the text (may not work with all patterns), other options include opening pattern on phone and zooming in on text while projecting from other device. Or open pattern in your regular PDF reader on computer to zoom in there to read text.
For mirrored pieces, you may find your projector file has helpfully included two mirrored copies, if so just scroll to next piece to cut it. Or if only one copy is provided you can mirror the PDF using the “Flip” function in Pattern Projector (look for Flip Horizontally, and Flip Vertically icons in PP toolbar) or Project & Cut (menu bar > View > Flip) , and then cut next piece from the mirrored view. Remember to switch right back to normal view, afterwards. Pattern Projector has also recently added a second Flip tool to flip exactly on the fold line you select: 1) Tap Line Tool in PP toolbar (looks like ✏ and 📐 ), 2) Click to draw line on the fold line of your piece, 3) toolbar will appear on left side of screen, tap the Flip icon there, and pdf will be flipped along that foldline).
Similarly, if using an A0/Copyshop or other file with pieces cut on the fold, you can use Flip/Mirror function in Pattern Projector or Project & Cut to first cut half of the folded piece, mirror the projection, then line up the foldline with the half you just cut and then cut second half to have a complete piece. Remember to switch right back to normal view, afterwards.
Tracing from projection is also done by many projector users. The big advantage of tracing from projection, instead of from printed pattern, is that we can trace straight to cardstock, oaktag or other opaque, heavier paper, instead of having to use flimsy tracing paper.
If you want to make most economical use of your fabric it also helps to prepare your cutting plan by with the “pattern piece preview” method to be able to create a puzzle piece layout first:
- Read first pages of tutorial file that show which pieces you will need to cut, and how many of each. Also take a look at fabric marker pictures provided in tutorial which shows the recommended cutting guide.
- For minimizing fabric waste, it is always recommended to start with largest pieces first.
- Before starting with cutting, project one piece at a time on your fabric and make quick marks with chalk or painters tape to roughly outline the area each piece will take. 5
- That way you can adjust which area you plan to cut each piece before cutting to make the “puzzle pieces” of the pattern all fit in your fabric. (And of course staying mindful of grainlines and any directional print or nap in the fabric.)
- Puzzle-piece layout to minimize fabric waste usually works best with cutting on a single layer of fabric, so having pieces unfolded and mirrored is helpful for that. Many projector files are laid out that way, but if your pattern has pieces on the fold, use the Flip feature in Pattern Projector or Project and Cut to project one side, then the other as you mark out space for pieces on your fabric. See Tip #4 above for how to use the new “Flip on Line” tool in Pattern Projector, it especially helpful for flipping PDF right on a fold line.
Planning “puzzle-piece” fabric cutting digitally – create a new pdf as “fabric marker” with all your pieces.
This method uses a free program for Mac or Windows called Inkscape. For more information about how to download and use Inkscape, see The Beginner’s Guide to Inkscape for Projector Sewing. This video demonstrates Layout sewing pattern pieces in Inkscape for projector sewing: https://youtu.be/i7u4PnRwkLg
When projected image is not as big as your piece, there are three options:
Method A: Trace to paper just the smaller part that won’t fit in projection, then align tracing with main projected part of pattern, and cut piece all at once
This method avoids having to shift fabric, but does require paper (can be any paper, no need to use flimsy tracing paper).
Make sure to mark multiple reference points in the tracing in the overlap area between smaller and larger parts of piece. For example you can use as marks, letter in the word on the pieces, lengthen/shorten line, notches, etc. in the overlap area you are tracing (minimum of three will give best results). Then when projecting, line up the traced part with the main larger part that you are projecting, aligning the marked points in the overlap area and pinning the paper to the fabric where those marks are projecting. Then cut from the projected lines for most of the piece and lines on paper for the rest of the piece.
Method B: Cut in two stages, pinning reference points and shifting fabric and scrolling projection and realigning pins with reference points.
This method requires shifting fabric, but no paper or tracing is required.
Cut as much as you can see of your piece in first stage. Then use pins to mark three or more landmarks close to the part of the piece that is not visible, for example, end of the arrow of grain line, intersection of two pattern lines, specific spot in logo or words, notch, can even be a reference point outside the piece, like the edge of another piece. Once at least three landmarks are pinned, then you scroll the projection, so that the remainder of piece is visible in projection, then shift fabric to realign the three pinned reference locations with those same landmarks on pattern. Once fabric is realigned, then proceed to cut remainder of piece.
Method C: Remove table, to cut from floor or lower surface, so that projection is larger and entire piece fits.
If you are projecting on table, and table can move, you could move table out of way to create larger projected image for when you need to cut large pieces. The auto-calibration feature of Pattern Projector and Project and Cut softwares makes this method quick and easy, if you are able to cut on the floor.
Pattern adjustments “on the fly” while projecting (no need to learn digital tools):
Videos on adjusting height:
It is worth watching both videos, they are short, and both methods can be used depending on your fabric and pattern, and what is most convenient in the moment.
Adjust height using scrolling the projection method: https://www.facebook.com/groups/ProjectorsForSewing/permalink/518887965686813/
Adjust height using slide the mat method: https://www.youtube.com/watch?v=23GW2Yht8Jo
A third method, Adjust height using Line Tool in Pattern Projector is so new it doesn’t have a video yet, but is an easier variation of the scroll projection method:
Available when using Pattern Projector to project your pattern
In the toolbar there’s a new “Line Tool”:

Which allows drawing a line of length you want (length will be shown while you draw it, along with angle. Angle of 0 degrees will keep line aligned with grain line, if grain line in fabric runs along length of projection).
Then a menu option comes up to “Move PDF by line length”.
This option will scroll the projection in the direction of the line, for the length of the line. In this picture, the pattern would be scrolled from left side of screen to right (direction of purple line), by 1″ (length of purple line), when the “Move PDF by line length” icon (black arrow) is clicked/tapped.

This line can remain on screen for your entire projection session, and anytime you need to adjust height, in this case by 1″, just press Line Tool, and then Move PDF by line length tool, and the pattern will be scrolled by that amount. This method cane be combined with the methods explained in the videos above to then blend the pattern piece lines to smoothly transition in the area where height of the pieces was adjusted.
Video on blending sizes:
https://www.facebook.com/groups/ProjectorsForSewing/permalink/508945273347749/
Digital Pattern Adjustments
Learning digital drawing programs/vector editor software to make pattern adjustments is easier than it may sound. Now that version 1.3 of Inkscape can import PDF layers, it is a great time to learn this free software for all our projecting / adjusting / fitting / hacking needs. Inskcape is open-source vector editor/illustration software runs on Mac, Windows or Linux. Another popular vector editor/illustration program is Affinity Designer (paid, not free) – there’s a group as well: Affinity Designer for Pattern Design and Alterations. (Affinity Designer runs on Windows, Mac and iPad.)
This new beginner’s guide to Inskcape gives a good understanding of the basics of Inkscape to them be able to better understand the steps for specific adjustments used in the tutorials linked below. Start here:
The Beginner’s Guide to Inkscape for Projector Sewing: https://sashasewist.info/inkscape-guide/
We no longer need to use PDFStitcher to first save the PDF with just selected layers (but if you prefer that, it’s fine to keep doing that), so you can skip that step seen in many of the following videos/tutorials.
Tutorials for digital pattern adjustments:
Karen’s written tutorial for Basic Steps for Unfolding Pieces and Using Inkscape (PDF)
Nicole’s videos on using PDFStitcher and Inkscape (free software for Windows or Mac).
Nicole Couch is a Projectors for Sewing group member who has a few great intro videos for pattern adjustments. Make sure to like and subscribe!
- Using PDFStitcher and Inkscape for quick layout improvements to your patterns to make them easier to cut:
https://www.youtube.com/watch?v=ZvNuyUhO2s0 - Inkscape class Part 2: lengthen/shorten, blending sizes, FBA (for knits, dartless)
https://www.youtube.com/watch?v=EunwYV6PLGM
Cathleen’s videos:
- FBA on a darted bodice: https://www.youtube.com/watch?v=JFYC-PTsAJ8
- overcoming obstacles to ungrouping objects into paths to help with lengthening and shortening: https://youtu.be/lKHuFjwn4FQ
Marta’s videos for digital pattern alterations using Inkscape and GIMP (free software for Windows or Mac)
Marta Gvozdinskaya @ Technie Sewing – YouTube
Marta Gvozdinskaya is a Projectors for Sewing group member who has created a whole series of youtube tutorials (text in subtitles or on screen, some now with voice) that help you learn how to use digital editing tools to prepare them for projecting, or make pattern alterations. Here are links to relevant playlists on Marta’s YouTube video. Make sure to like and subscribe!
Marta’s Projector Prepping Series:
https://www.youtube.com/playlist?list=PLSlye7yENylAh1C7nvEiXi4WVsQMGrTAH
Including:
- How to create “puzzle-piece” or “tetris” fabric layouts: https://www.youtube.com/watch?v=i7u4PnRwkLg
- Isolate the size line for a pattern without layers:
https://www.youtube.com/watch?v=wUlMCSOmFqs
Marta’s Digital FIt Adjustments (including height adjustments, swayback, broad shoulder and dartless FBA tutorials):
https://www.youtube.com/playlist?list=PLSlye7yENylCCn_vINrr5NbpTd2-girhh
Marta’s Inkscape Tips and Tricks
Including Inkscape shortcuts: https://www.youtube.com/watch?v=BBmDzIf_OB4
Marta’s Inkscape Sewing Tutorials
Marta’s GIMP sewing Tutorials
Recent Marta videos using Inkscape 1.3:
Trace a sewing pattern with Inkscape | Easy and precise
Inkscape 1.3 is awesome on so many layers
Always measure projected test square as a double check that pattern scale is still accurate.
Most projector users cut on a single layer of fabric. This helps avoid cutting off grain as we can position fabric grainline perfectly aligned with pattern grainline, and not shifting will occur. It also reduces time folding and refolding fabric.
Just like when cutting with paper patterns, we cut one piece at a time. When projecting, we scroll pattern to position first piece where we want it on our fabric and cut first piece, then we scroll the projection to position second piece, and cut that one, etc. If we run out of fabric under the projection to cut our next piece, then we shift fabric and then we can continue cutting and scrolling, and only repositioning fabric when needed. See Tip #6 below for making a cutting plan when using a projector to minimize fabric waste.
Make sure to use the tools in the projecting software, such as reverse colours function in Pattern Projector or Project & Cut for best visibility of lines. If text is hard to read, Pattern Projector has a hover function to magnify the text (may not work with all patterns), other options include opening pattern on phone and zooming in on text while projecting from other device. Or open pattern in your regular PDF reader on computer to zoom in there to read text.
For mirrored pieces, you may find designer has helpfully included two mirrored copies, if so just scroll to next piece to cut it. Or if only one copy is provided you can use “Mirror” function in Pattern Projector or Project & Cut to mirror the PDF, and then cut next piece from the mirrored view. Remember to switch right back to normal view, afterwards.
Similarly, if using an A0/Copyshop or other file with pieces cut on the fold, you can use Mirror function in Pattern Projector or Project & Cut to first cut half of the folded piece, mirror the projection, then line up the foldline with the half you just cut and then cut second half to have a complete piece. Remember to switch right back to normal view, afterwards.
Tracing from projection is also done by many projector users. The big advantage of tracing from projection, instead of from printed pattern, is that we can trace straight to cardstock, oaktag or other opaque, heavier paper, instead of having to use flimsy tracing paper.
This tip will allow you to access your patterns from anywhere, and be synced to your devices with automatic backups. See this blog post for specific recommended online drive services and how to easily use them for PDF pattern access and storage:
https://sashasewist.info/storing-pdf-patterns-for-easy-access
It’s easy to make custom size rectangles and other shapes in lots of different software you may already have access to:
- Google Drawing
- Google Slides
- Canva
- Microsoft Word, Publisher or PowerPoint
- Illustration programs like Inkscape, Affinity Designer, Adobe illustrator
- Page layout programs like InDesign
In each of the programs the basic steps are:
- Change page size to be big enough for your desired shape(s). Look in menus, usually File, for Page Setup, or Document Properties. Select Custom, and enter page dimensions you want.
- Then look for shape tools, in Menus they may be located under Insert menu, or if program has tool bar icons, looks for rectangle circle or icon for shape you want to make.
- Create the shape you want, then you will adjust measurements so shape is size you want. There may be H and W measurements in toolbar, or you may need to right-click the shape (control-click on a Mac), and look for Format Options, or Shape Properties. Then panel will open on right side of screen, and enter desired measurements in the boxes for size.
Then you can save/export from these programs the file in PDF format. Then you open the PDF if the software you use for projecting, Pattern Projector or Project&Cut, and as long as your calibration remains accurate, your shapes will be projected at accurate size.
Very useful. Thank you 🙂
Fabulous guide full of knowledge and further resources. Thank you!
Thanks for your work. 🙂
This is so helpful, thank you ☺️